Blog
More Options
I went out to the land yesterday morning for the first time in a couple months. We’ve been to my sister’s house several times, but have somehow managed to not go 5 minutes up the road to the land. Fortunately, everything looked good. It’s about knee high, but since it’s dry, it’s not too hard to walk thru. I tried to find the rocks we marked for the back of the house. I eventually had to use the pictures on my phone as reference and I was able to find them.
I also checked on my roses. To my surprise, 6 of the 9 had recent growth on them so I haven’t lost any since the last time I was out there. I tried to cut them back some for the winter. If I can get them thru the winter, I should be able to take better care of them next spring. I like walking around out there – it’s so peaceful and something I really needed this week. I’m still having a hard time believing a house will start going up there in a couple months (hopefully).
I left there and went to a nearby stone/tile store. I ended up being there a lot longer than I planned since the sales woman showed me around. We walked thru the stone slabs first. They had the most I had seen. I’d prefer to stay away from marble since it’s more maintenance, but this slab was pretty with the blue/gray veining.
This one had green veining which was also pretty.
This granite slab has a lot of color and is pretty busy, but it had a lot of silver sparkle in it and was pretty. Orion Blue Granite:
They had a slab of leathered Antique Brown (Marron Cohiba) which is moving it’s way up my list for the kitchen. It was nice to see it unpolished, but I would have it honed instead of leathered. The leathered gives it a texture that I worry would be harder to clean in the kitchen. I’d like to get a sample of it to compare to the Cambria Praa Sands sample.
After looking at the slabs, I went thru their tile. I mainly wanted to see what they had of the Jeffrey Court tile.
They had the same sample board that I fell in love with before.
Along with more samples from the same collection.
This is the field stone that matches the sample board above. Fortunately, the price isn’t too bad compared to a lot of the other stuff I’ve seen.
Heres a border that also matches it.
Also really like this sample board with this border:
This is a little more rustic than I like, but I like it.
Some glass mosaics that caught my eye:
I’ve been in contact with the draftsman this week. He should be getting the elevations to us soon. He also asked for my electrical plan so I emailed that to him. It’s not perfect, but it should be enough to get him started. Any needed changes later should be easy to fix.
Brick And Stone
I did some more running around with my parents this week. Monday, we drove thru a neighborhood of builder foreclosures. We walked around one that was pretty nice. I’ve been trying to figure out what to do with our porch ceilings and I thought this idea might work. I would probably use a less tan stain on it though.
Next we went to one of the brick and tile stores. It was the supplier for our old house and is apparently who our builder uses too. I wanted to see if I could find anything close to what is on my inspiration pictures.
Of the samples in the store, this was the one I liked the best.
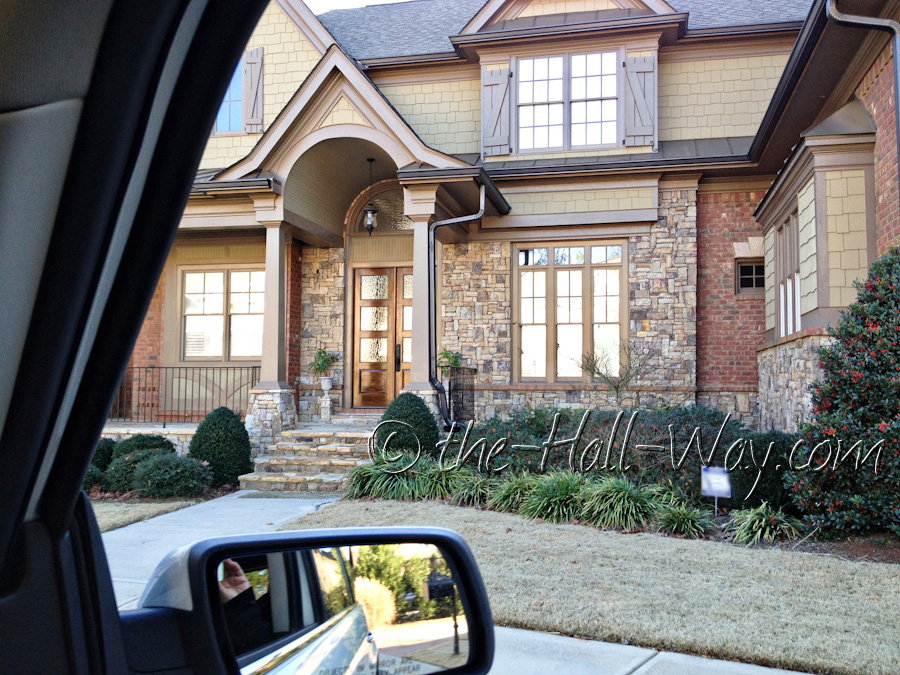
They gave us a list of addresses in a neighborhood with several of their bricks. Here are a few houses with that brick on it. (Unfortunately, it was cloudy that day.) I can’t decide if it’s the look I want or not.
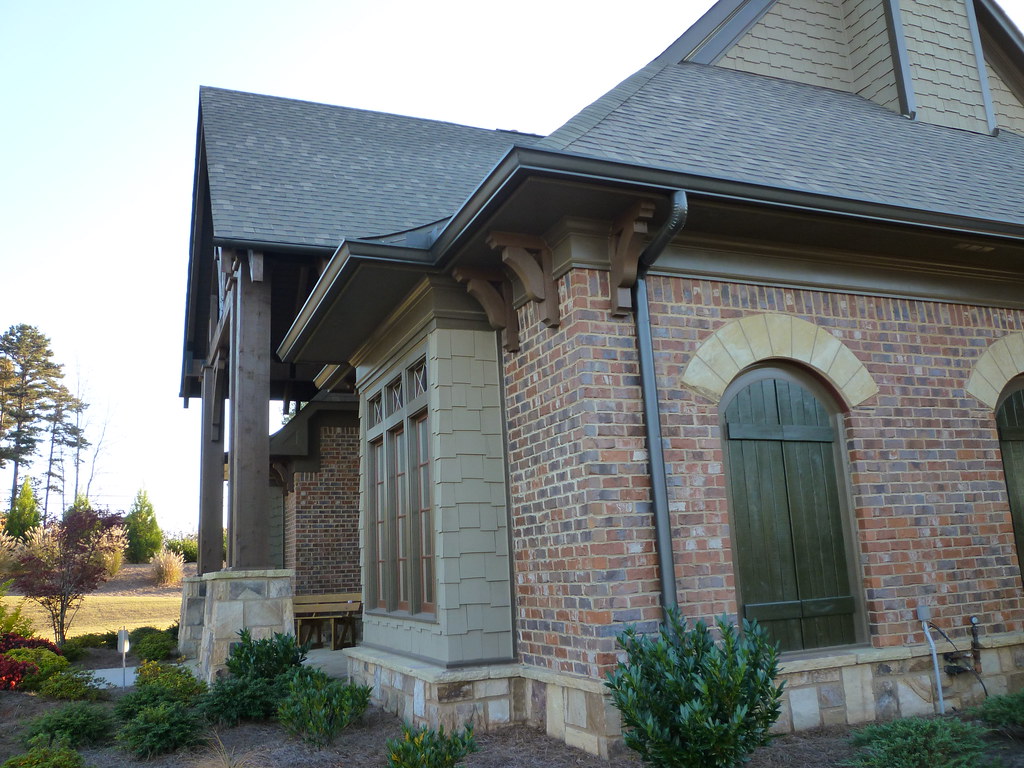
Here’s another house in that neighborhood, but it’s by a different builder so we don’t know what the brick is. I pretty sure it’s a different company though because it’s the same builder as my sister’s house.
We had some time, so we ran thru another neighborhood to look for more options.
This one really caught our attention. It’s brighter than I was thinking, but it might work. Also not sure what this brick is, but I have the address and may ask the brick company if they supplied it.
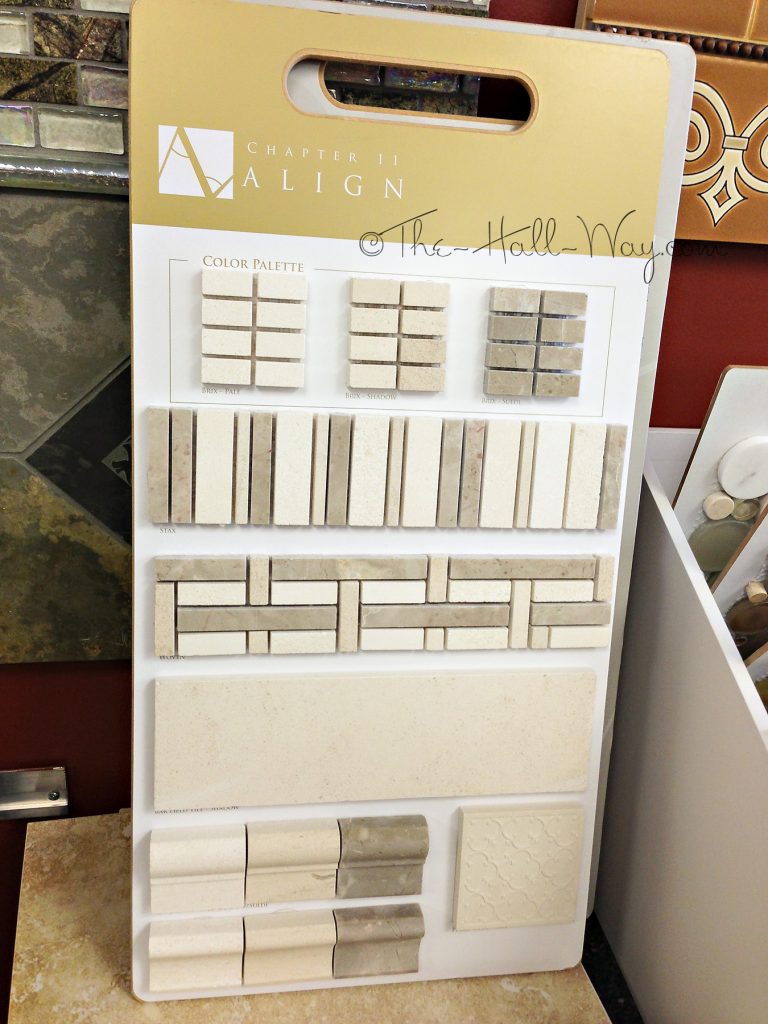
They also had a lot of tile there and I came across a brand I hadn’t seen before. I fell in love with this sample board as soon as I saw it. Right now, it’s my first choice for our master bathroom. The main stone is travertine and the mosaic has metal and clear glass tiles in it.
Here are some more from that company.
Also really like this with the blue, but I’d probably want to use something more neutral.
A possible kitchen backsplash:
This one has a mix of slate, glass and rainforest granite/marble.
They also had more of the crackled glass that I like. This is a different brand that is apparently cheaper than the other one I’ve been looking at, but I can’t find too much info on it.
Also thought this glass tile was neat, but I’m not sure where I would use it.
They had a section of the floor done in a pattern I’d like to work into our house somewhere:
Our last stop on Monday was a stone yard. They didn’t have a ton, but mom and I saw a few that caught our eyes. This is Diano Reale.
This is Botticino Fiorito Marble and it’s really pretty.
This was pretty spectacular, but I don’t think I would put it in my house.
Volga Blue Granite:
I’m considering this Antique Brown Granite for the kitchen perimeter countertops, possibly in a honed finish. It has a slight brown/gray tint that might go with the Cambria Praa Sands Quartz that I’ve been wanting to put on the island.
I went to another stone and tile store today and saw a lot more slabs along with more of the Jeffrey Court tile which will be in the next post 🙂
Samples
When I haven’t been working in the garage, I’ve been researching selections for the new house and collecting samples – flooring, paint chips, etc.
As I’ve mentioned before, we’d like to have hardwood floors throughout the entire house (in addition to tile) and we need something really durable for our large dogs. I had pretty much narrowed it down to Brazilian Walnut (Ipe) or Brazilian Teak (Cumaru). Both are used for exterior decking and are some of the hardest woods on Earth. I love the look of teak, but after getting a few more samples, I’m not sure it’s the look I want.
It’s a bit too light and has too much gold and red in it. I’ve managed to get my hands on several more pieces of Brazilian Walnut and now have them laying along our bedroom wall where I can walk by them several times a day.
As I received each sample, we began to get concerned about the wide range of color variation. After looking at a ton of installation pictures online, I noticed that some appear to have a lot of variation and others have less. I actually don’t mind variation, but as you can see below, we have everything from a light golden-green to almost black.
These 3 samples are from the same vendor and also show the most variation. The middle piece is almost black in person and it looks incredible (although I wouldn’t want my whole floor that color because it would always look dirty). The piece on the right has a lot of green on it and is a bit too light compared to the rest.
Here they are grouped together by vendor.
After looking into it, it appears we need to buy clear grade flooring for the least variation. I will also probably end up spending a lot of time at the house while it’s installed so I can inspect each board and make sure they are laid in a random pattern. I found a place with by far the best price on clear grade, prefinished Brazilian Walnut, but I’ve read that their shipping can be high which offsets the low price. We discussed the possiblilty of picking it up from the warehouse which is about 8 hours from here. The problem with that is the weight. I’ve estimated the amount we need will weigh over 14,000 pounds. (This wood is extremely heavy – ~3.7 pounds per square foot). David’s truck will ‘only’ pull 10,000 pounds. The largest U-Haul will only hold 7,600 pounds. We may be able to rent a flat bed truck, but we haven’t looked into it yet. Wouldn’t exactly be a fun trip, but it would be worth it to save a chunk of money on shipping
Anyway, after walking by the walnut for the past couple weeks, I really like it and can’t wait to see it in the new house.
Meanwhile, I’ve already made a couple purchases for the new house. The first was a ceiling fan which is currently installed in the bonus room of our rental. There was just a ceiling light up there when we moved in, but there really needed to be a fan up there. We decided to go ahead and get one we can use in the new house. I found this style a while back and really liked that it is close to the ceiling and fairly non-descript. It’s really quiet and moves a lot of air.
I also came across a great deal on our favorite shower heads on Groupon, so I ordered 2 with matching arms. My parent’s 50 year old house came with the original Speakman shower heads. They are the greatest things ever. On their hardest setting, they are almost like a pressure washer. When my parents remodeled, they bought some nice Grohe showerheads, but it didn’t take long for them to change the main shower head back to the old Speakman. They plan to take them with them when they move out. Our old house came with cheap builder’s grade shower heads so we replaced the master showerhead with a Speakman similiar to this one.
While it’s not as big and heavy as my parents’, it still has very little plastic in it and you could probably knock someone out with it. The shower heads in this rental were awful, so we brought that one with us and bought another one for the guest bathroom.
This one is mostly plastic, but it still works great and is fine for the guest bathroom. A couple weeks ago, I saw a pin on Pinterest for a great deal on Speakman shower heads and arms. I jumped on it and bought 2 of each for over 60% off the list price.
This shower head is somewhere between the 2 we already have. It’s not all plastic like the guest bathroom one, but it’s not has heavy as the brass one in our bathroom. They look really nice though and are the polished nickel finish I want to use in the new house. Now, if I can just find more deals like this for the rest of the house . . .
DIY Overload – UPDATED
*UPDATED 4/9/2013 to add pictures of the Farmhouse Bed complete with it’s mattress and bedding.*
I’ve spent the past couple weeks working in the garage on several projects. My parents needed a bed for their room at my sister’s new house and my sister needed a new bed too. She also has a ton of DVDs, so I wanted to make some closet dvd storage for her. My dad originally made one of these along time ago and we remembered it at our old house when we were trying to figure out where to store our movies. They are pretty easy to make (I made 2 in a couple hours last week) and are a great alternative to having furniture or closet space taken up by DVDs. (You could also use them for CDs). They hang on the inside of a closet door so they are out of sight. Below are the materials and cuts I used to build them.
Dimensions: 19.5″ Wide x 61.5″ Tall
Materials:
3 – 1×6 @ 8′
3- 1/4″ Square Dowl @ 3′
2 – Over the Door Hooks (This or something similar)
1.5-2″ Wood Screws
Wood Glue
Cut List:
8 – 1×6 @ 18″
2 – 1×6 @ 61.5″
8 – 1/4″ Square Dowels @ 18″
I glued and screwed 2 of the 18″ boards together for the top for added strength. Then I used screws and glue to attach the shelves to the side boards. The shelves are evenly spaced, approximately 9.25″ apart. (For CDs, you could add more shelves closer together.) Once assembled, I glued the square dowels flush to the front edge of the shelves to keep the DVDs from falling off the front. I then drilled 2 holes thru the top boards for the hooks to go thru. For the one at our old house, we painted it with our trim paint so it would match the closet door it hung on.
Here is ours hanging inside our office closet door. It’s important to make sure your door is big enough to hold it and you have room inside the closet to still close the door (for example, this usually doesn’t hang on this door because there isn’t room to close the door – I just moved it for the picture.) My sister’s doors have levers on the inside, so it has to hang closer to the hinge. Another option is to secure it straight to the door if you have solid wood doors and don’t mind the holes.
Here is a close up of the shelves. Each rack cost around $35 to build and took less than 2 hours plus finishing time.
Next, I started working on my parents’ new bed. I built this plan, which is very similar to a bed mom had been wanting. It’s the largest and “fanciest” project I’ve done so far, but it went together fairly easily. The original plans were for a queen size so I had to modify it to make a king. That mainly involved adding 16″ to all the width measurements. I also used 1×8 boards for the headboard panels instead of 1x6s.
It is painted with Satin White Latex Enamel.
The hardest part of the whole project ended up being getting it into my sister’s house. The legs made the platform about 1/4″ too large for the doorway. It was really frustrating because it was so close. We were about to take one of the legs off which would have been a disaster since they are glued, screwed and painted on, but we finally found the perfect angle to get it thru the doorway. I had to touch up the paint in a few spots, but that was much better than having to remove and replace one of the legs.
We still need to get plywood for the mattress to sit on and I’m going to add a middle leg between the 2x4s for extra support since it is a king size.
UPDATED 4/9/2013 – Here are pictures of it as it is now.
After we got that one out of the garage, I started work on my sisters bed. It is a lot less complicated and was already written for a queen size, so I didn’t have to do any modifications. The only change I did make was to use 1x6s for the legs instead of 1x3s so it would sit higher off the floor (her cats like to sleep under her bed). The original plans are Here and Here.
I painted it with RustOleum Painter’s Touch Metallic in Oil Rubbed Bronze. I really like how it looks. The wood grain shows thru some which gives it the illusion of stain. It also has a slight metallic sheen in the right light, but it’s subtle. The only downside is that the metallic flakes give it a rough texture. I contemplated putting a couple coats of poly on it, but decided to wait. Luckily, getting this one in the house wasn’t a problem ;P
She doesn’t have a queen size mattress yet, so this was taken with her full size on it. I’ll try to get better pictures with my real camera once she gets her new mattress.
Meanwhile, we saw our builder this weekend at the Parade of Homes. Their son’s house was on the parade so we stopped by to check it out. It had a lot of similarities to what I want (kitchen, trim, etc) which was nice to see. It got me really excited again about getting started. We were there for over an hour and had a good time talking and getting more information We still hadn’t seen anything from the draftsman (it’s been 7 weeks), so the builder called him on Tuesday and I sent him an email on Wednesday. We got an email from the draftsman yesterday morning which had the basic floor plan drawn. He is working on the elevations and roof now so hopefully we will see them soon. Very excited about finally seeing how the outside is going to really look. Hopefully I’ll have another post on that soon!
Day Trip
I’ve made it to a few more stores over the past couple weeks to gather ideas for the new house. I stopped by Lumber Liquidators and got more information on the floors we are considering along with some more samples (more on that in another post). I’ve spent a lot of time looking at light fixtures online, but also stopped into a couple local lighting stores to see some in person. Below are a few things that caught my eye.
James R. Moder Florale Chandelier:
Thought this would be neat for the garage or porch (needs a different color blade though). (Quorum International Hudson Galvanized Patio Fan)
I’ve seen this online, but never in person. It would be neat in the family room, but doesn’t really go with our style. Not to mention, it’s really expensive. (Casablanca Candelier)
Possible Exterior Light:
ET2 Inca Pendants
Here’s a possible fan for the family room although we would probably get it in the nickel finish. (Fanimation Levon)
Industrial Pendants
I had seen this chandelier online and thought it was ugly. It’s really neat in person though. It’s made up of thin chains – almost like necklaces. (Maxim Lighting Chantilly Chandelier)
I would love to have this one over the piano, but it’s too expensive, of course. When you get up close, you can see all the little details – flowers and leaves in the design. You can see a more detailed picture at the link. (Schonbek Ekaterina Chandelier)
Thought this would be neat over the staircase, although it’s a bit much. It’s about 8′ tall. (James R. Moder IMPACT Crystal Rain Chandelier)
These completely don’t go with the style of our house, but they were beautiful. After some research, I believe they are Turkish Glass Mosiac Lanterns. They look like they are made of beads and glass.
Friday, we finally made it to Nashville for a shopping trip. It had been a couple years since I used to worry about driving there only to get a call from someone wanting to show the old house. First, we went to the Ferguson Showroom which was about 4 times larger than the one here. I could have spent hours there.
This caught David’s eye in their outdoor display:
We also liked rock wall water feature and talked about whether we could build one ourselves. I saw the bases for it at the patio store. Building the rock wall wouldn’t be difficult, we were just trying to figure out how the water was coming from at the top.
I also liked this idea for lighting the staircase.
Even the woman’s bathroom was fancier than most houses 🙂
Some ‘bling” cabinet hardware (Creations by Alno):
They had the Kohler Pinstripe Pure faucet I love along with the Kohler Kallos Spun Glass sink which was neat.
Next, we stopped at a tile store which was full of incredible options. This one from Artistic Tile would make a great backsplash although David thinks it is too “frilly”.
This is a little too fancy for my style, but it’s pretty spectacular. (Artistic Tile Vetromarmi)
3D Glass Tile
We saw a lot from Sonoma Tilemakers, again. I still really like their crackled glass tile and hope to use it at least one place in the house. (Sonoma Tilemakers Tantrum)
Sonoma Tilemakers Salvestrin
Sonoma Tilemakers Basketweave (love this but would use different colors)
They also had the Mosuprema Bella Cosa Medallion, but in a different color scheme.
Finally, here is a hand carved field tile from Artistic Tile.
I’ve pinned more tile ideas here on Pinterest.


