DIY Patent Art Using Silhouette Sketch
We finished up all the painting – walls, ceilings and trim in the Dining/Piano Room, Master Bedroom and The Kid’s Room. (I still need to paint the upstairs doors, as you can see below). In The Kid’s room, I painted one wall with chalkboard paint.

I used Rustoleum’s Chalkboard paint in Black. It went on pretty easily, although it is runnier than regular wall paint so I had to be more careful about drips. I used a regular roller and brush although I wonder if it would have been better to roll over it with a foam roller to smooth it out more. It looks good, but it is a little “rougher” to write on than I would have liked. The instructions said to let it cure for 3 days, than run the side of a piece of chalk all over the surface, then erase it off to season the surface. We have written on it a little bit, but I have some ideas I want to try. I’d like to recreate the Snap Circuits logo above his wall board, for one.
This week, I worked on some artwork for his room. Patent Art is pretty popular now, but is pretty pricey to buy. They sell patent sketches for all sort of inventions – instruments, toys, sports equipment, etc. I had seen a light bulb and fan and thought they would be perfect for our future engineer and my design for his room.
Patents are searchable online – http://patft.uspto.gov/netahtml/PTO/index.html. You can often find the patent number on the product or it’s manual. Once you search for a number, you can click on Images near the top of the page to view a PDF of the patent files and drawings. I found drawings for the original Edison light bulb and 3 original motorized fans, so I saved the PDFs to my computer. I cropped and straightened the pages in Photoshop, then saved them as JPG files.
Instead of just printing them on a printer, I thought it would be neat to use the Sketch feature on my Silhouette Cameo Cutting Machine. It works similar to a printer, but normally uses a blade instead of ink. I use it for all sorts of projects – vinyl decals, greeting cards, etc. There is also an option to replace the blade with a pen which creates a hand drawn look. I thought that would be a neat effect for the vintage patent drawings.

It took around 1-2 hours for it to finish each one.
Click HERE to view a quick video of one in process.
I used heavy watercolor paper so that it has some texture. The pen was just an old pharmaceutical pen we had lying around. Since it only outlined the letters, I went back and filled them in by hand.


The finished size is 12×16 (12″ being the widest my machine can do). I picked up some inexpensive metal frames from Hobby Lobby. (There is not a lot of selection in that size, so I’d suggest making them 11×14 instead). I was originally going to paint them silver or another color, but decided to just leave them black. I hung the 3 fan drawings over his new dresser.

Unfortunately, I managed to crack the glass on 2 of them, so I need to get those replaced 🙁

I hung the light bulb drawing above his nightstand. It looks a little high now, but his new headboard will be 6′ tall which will make it look more balanced.

All that’s left to do in his room is build his bed and create some shelves or storage for all his assembled Legos. The dining/piano room is done except for artwork on the walls. Our Master Bedroom is painted and I have our new quilt, but I still need to figure out some details before I can say it’s “done”. Art for the walls, some seating by the window, etc. For now, I have a bunch of stuff to sell on Craigslist – old furniture, baby items, bedding, etc. I need to get it all organized and cleaned up before I post them. Hopefully, that will offset all my recent projects! 🙂
Would you mind giving some detail about how you set up your Cameo to sketch the images? I’ve traced and detached the image, but it wants to only sketch the outside lines of each figure with no internal detail. If I don’t trace at all, it sketches the rectangle around the page. With just the “trace” feature, for some reason it only traces half the page and ignores the other half. And the lines are really jagged and would take lots of time to clean up. Is this how you did it and why it took an hour per image? Thanks for your help!
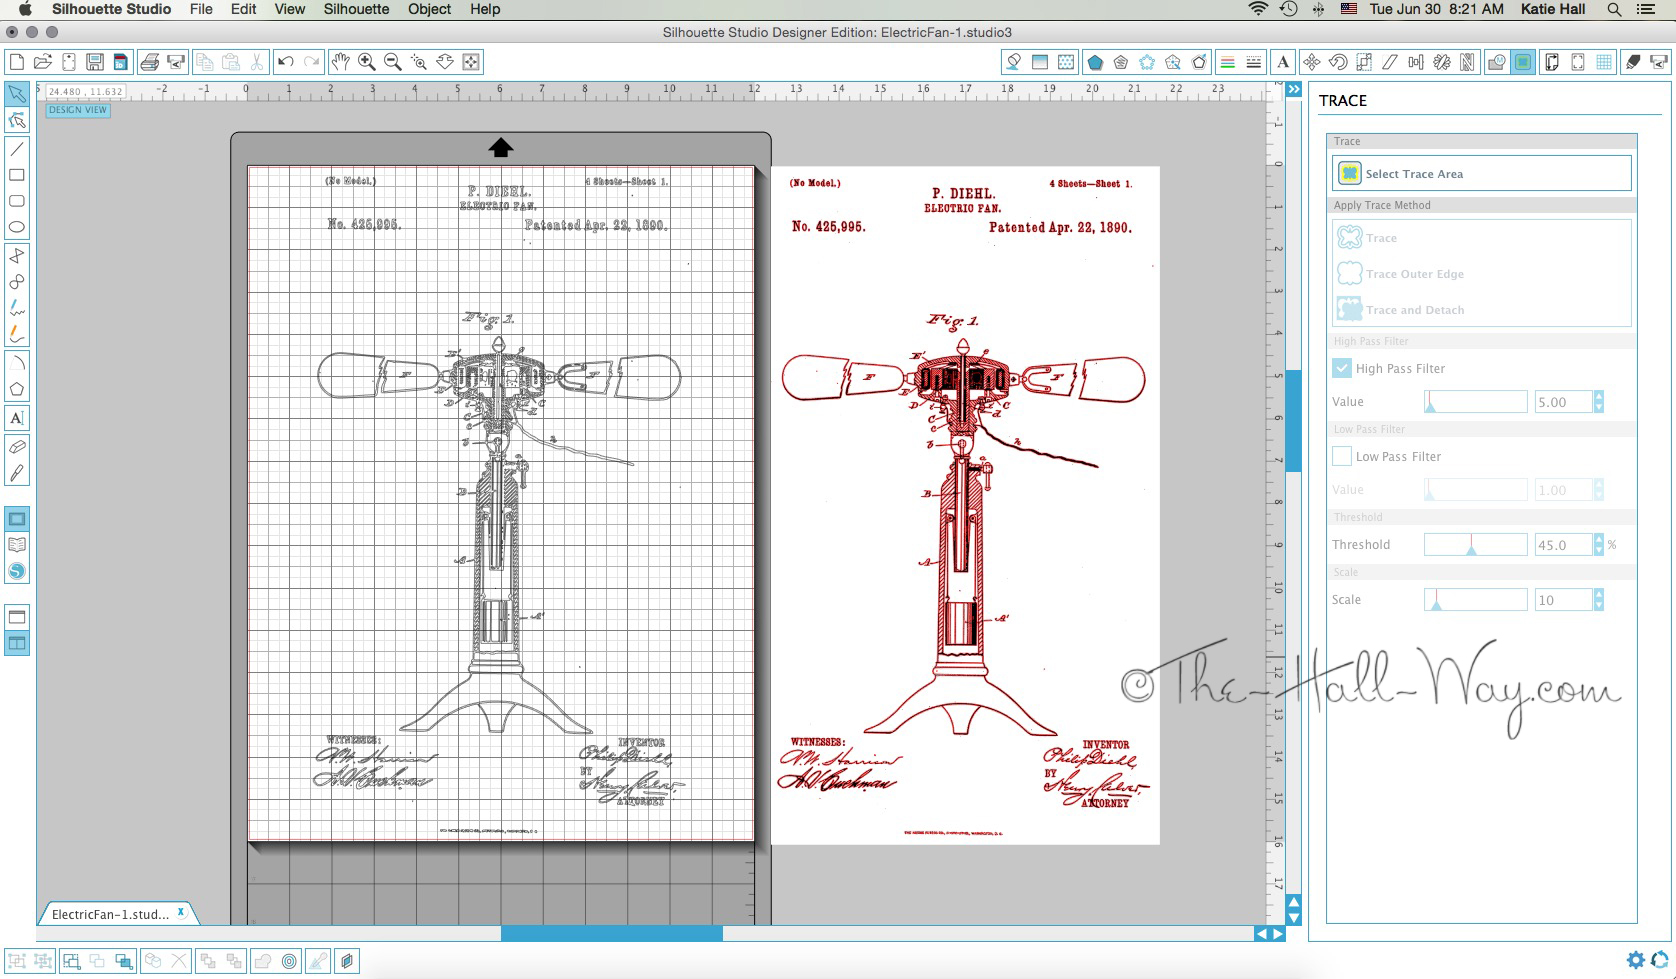
It’s been a while, so I’m trying to go back and remember what I did exactly. When you open the trace window, click Select Trace Area and you can then drag a square to highlight the entire area you want it to trace. Once you have it highlighted, click the first Trace button so it will trace both the inside and exterior lines. I did not have a problem with the lines being jagged. The only cleaning up I did was to remove some random specks in the white areas. I had also done some cleaning beforehand in Photoshop and I probably sharpened the image then to make it easier for Studio to trace it. You may have to adjust the Filter settings in the Trace window, but I’ve always just left them on the default. What took an hour was for the Silhouette machine to actually draw the images. I hope that helps!
This first picture shows the original image highlighted with the Trace tool. (When I actually did it, the image was on the mat, not off to the side.)
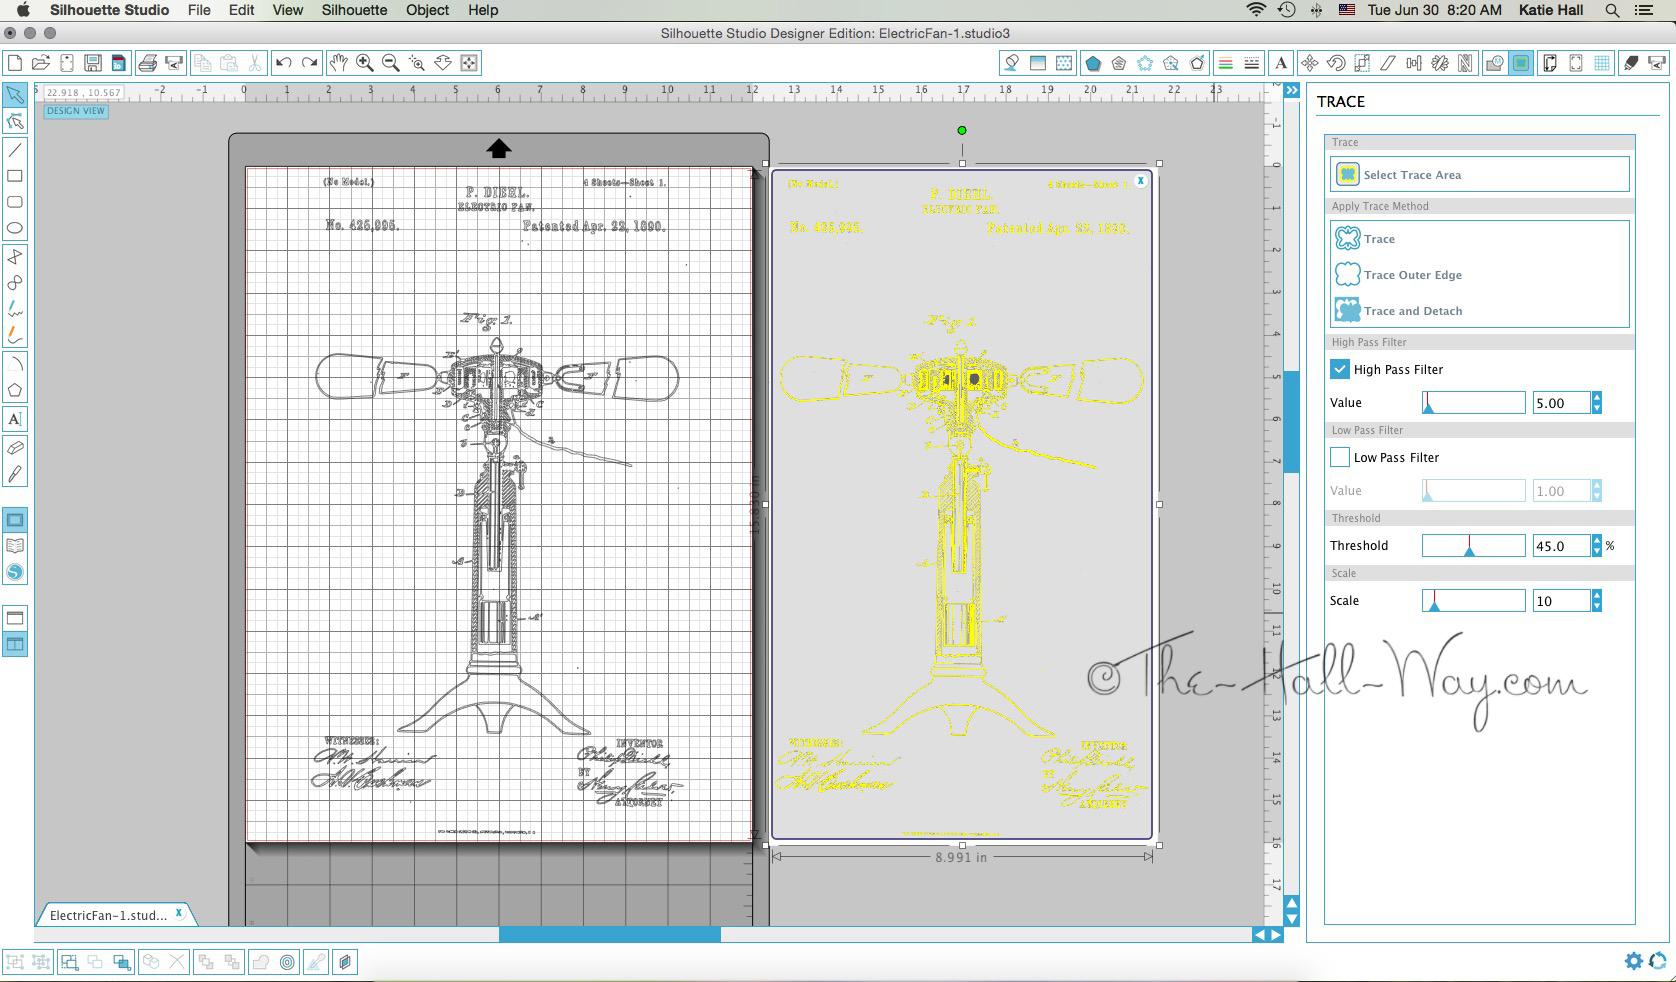
This shows after I clicked Trace.