Blog
Home Theater – Part 3
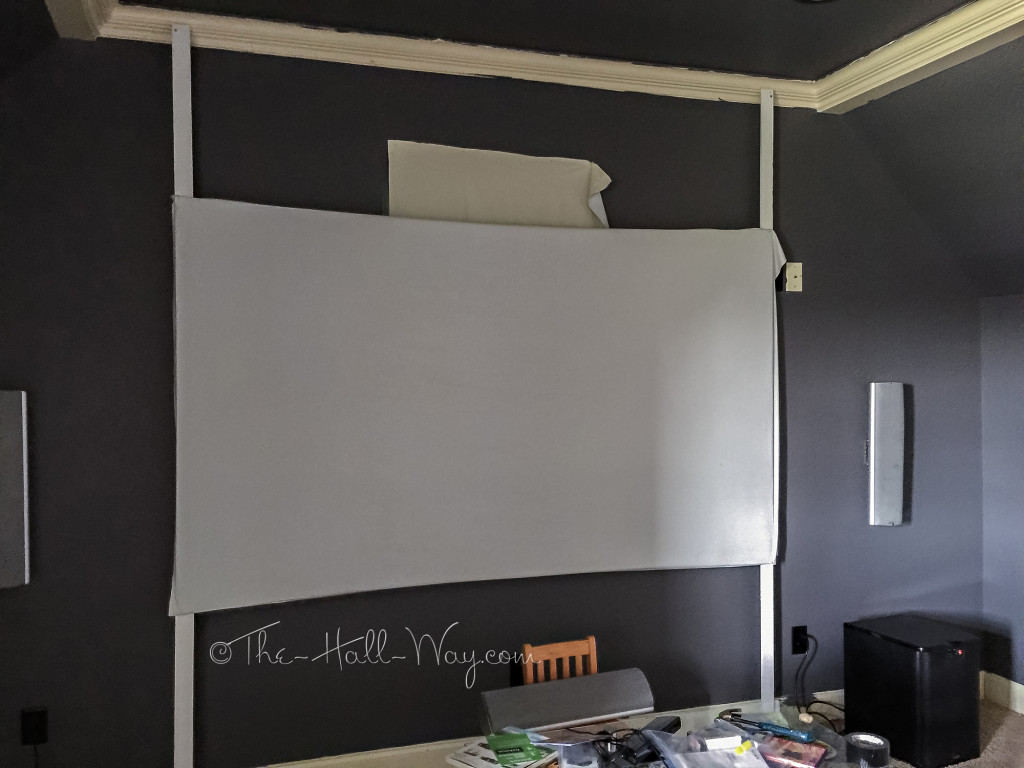
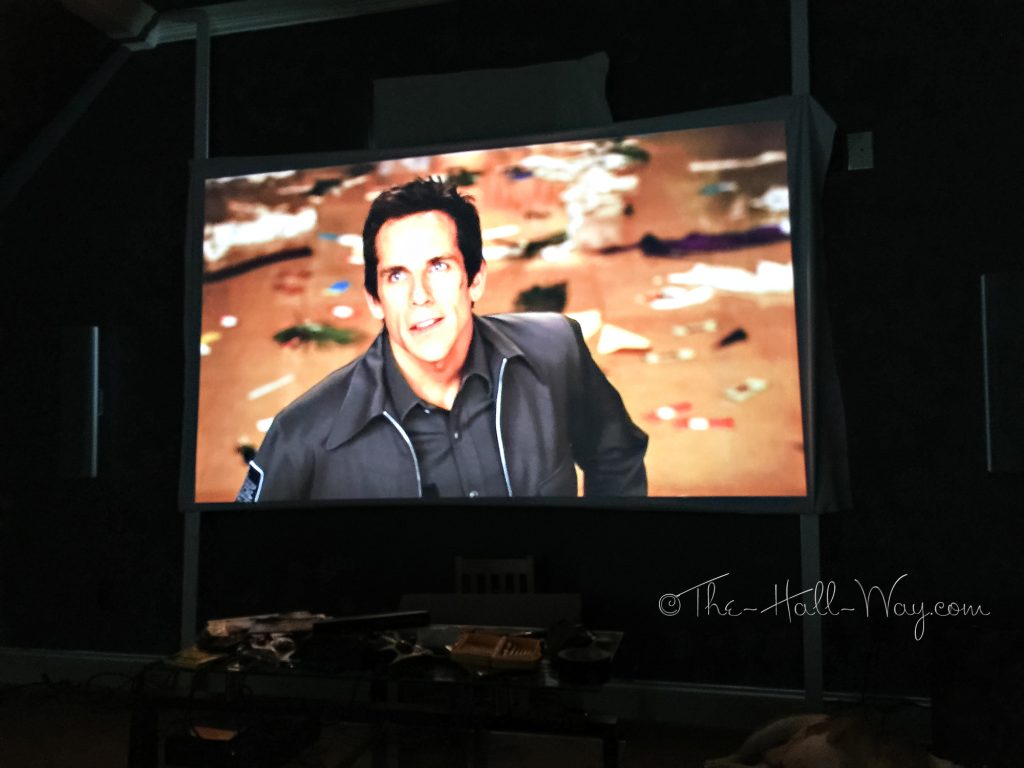
We returned from our vacation after my last post and our new screen arrived the next day. I didn’t get any pictures, but assembly was fairly easy. Just a lot of stretching to get the screen fit to the frame. It’s massive!
135″ Diagonal. As you can see above, we also finished painting all the trim and the doors in Behr Marquee Silver City.
Meanwhile, I needed to get something to cover the windows. Fortunately, our projector is bright enough the room doesn’t need to be pitch black, but for watching a movie, that is preferred. The plus side is we can watch football games and other sports without all the drapes pulled. I wanted to reuse the curtain rods that were in the house when we bought it. Unfortunately, I realized the old brackets were not going to work because they stuck out too far from the window. The effect of the blackout curtains would be negated by the 2+” of light coming out from the top and bottom of them. I needed something that would keep the rod closer to the window trim. I looked everywhere, but couldn’t find shorter brackets that weren’t in a set with rods. (Honestly, I would have saved a lot of time and frustration just buying new rods with brackets in a kit.) I turned to Pinterest and decided to use This Idea. Appearance wasn’t a concern because I planned to hang the curtains over the brackets so they wouldn’t be visible. Since my rods were larger, I used 1″ curved pieces.
Once I had the DIY brackets assembled, I spray painted them and the old rods with the Rustoleum Soft Black Iron spray paint I’ve been using elsewhere in the new theater.
I have the rods extended from wall to wall on the 3 dormer windows, so I did not reuse the finials. To keep the rods from sliding on the brackets and falling off, I used black silicone pony tail holders on each end.
After much searching, I decided on curtains from Home Depot. They are the Solaris Black Media Back Tab Curtains and I have two 54″ panels on each dormer window. They have a satin feel and look to them, but they are machine washable.
The DIY brackets keep the rod close to the trim so very little light escapes out the top or bottom.
The curtain panels have both back tabs and a rod pocket for hanging. I am using the back tabs.
The staircase window is smaller, so I hemmed a single panel down to around 4″ below the window trim. I reused some finials on this rod since it doesn’t have walls on either side. One side of the curtain is fixed by the bracket, but the other side is free so that it can be opened, if needed.
In my many trips to Big Orange and Blue, I’ve been picking up flooring samples. The most expensive option is to replace all the carpet and cover the seating platform to match. Otherwise, we’ll leave the existing carpet and cover the top of the platform with either resilient flooring (middle row) or laminate (bottom row). It has to be something fairly light and thin since the platform is going to be heavy enough as is.
To be continued . . .
Home Theater – Part 2
Continuing on from my previous post about Home Theater Progress, once we had all the wires ran, David began building the cabinet box for the electronics. He added holes in the back for an outlet, the HDMI cables and the speaker wires while trying to keep everything from being too close together and causing interference.
He then patched the drywall around the hole we had cut along with a few other places that needed repaired around the room.
Since the ceiling was now going to be a dark color, I wasn’t crazy about leaving the white recessed lights everywhere. (There are a ton up there!) I picked up a couple cans of spray paint and we painted a couple samples on the backside of one of the light trims.
 The metallic Rustoleum Soft Black Iron was a good match, so we went with that. We took down all 15 lights and I sprayed them outside. Once we had the ceiling painted, we reinstalled them.
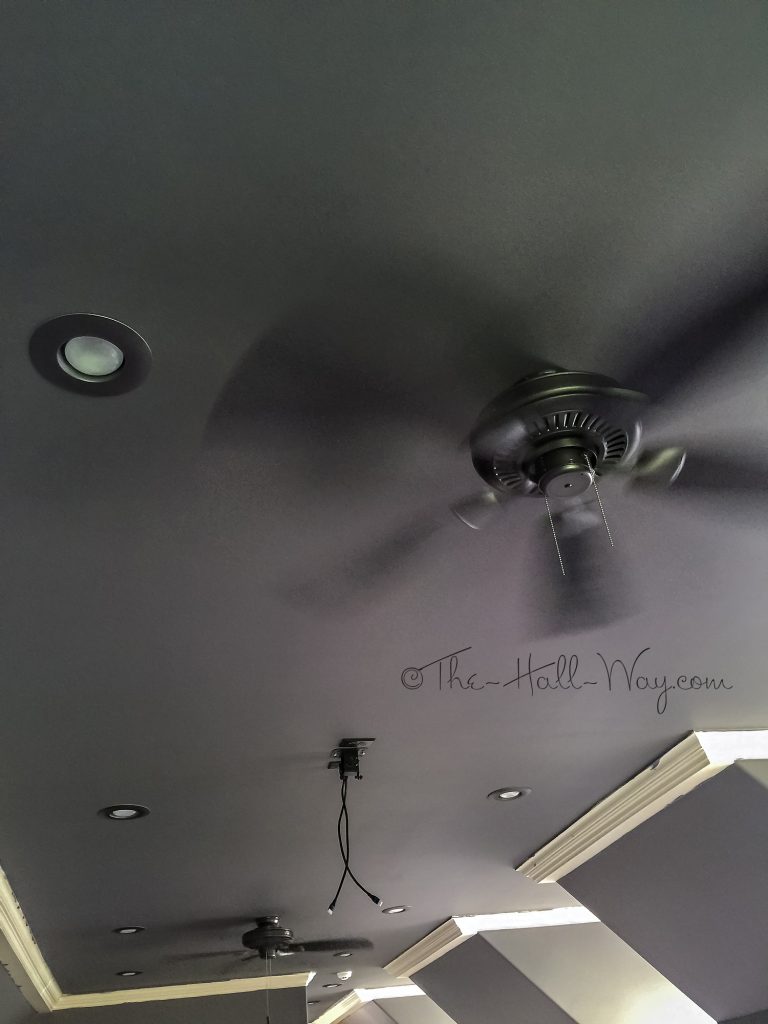
Obviously, the light bulbs are still white but they blend in much better than before. We also replaced both bronze ceiling fans with iron and black finished ones that are lower profile. One concern was whether the ceiling fan in front of the projector would interfere with the picture, but it’s not an issue.
While I had the spray paint, I went ahead and painted the white air filter cover which is at the back of the room and a white air vent above the door at the bottom of the staircase. At least now they don’t scream “Look at me” when you walk by.
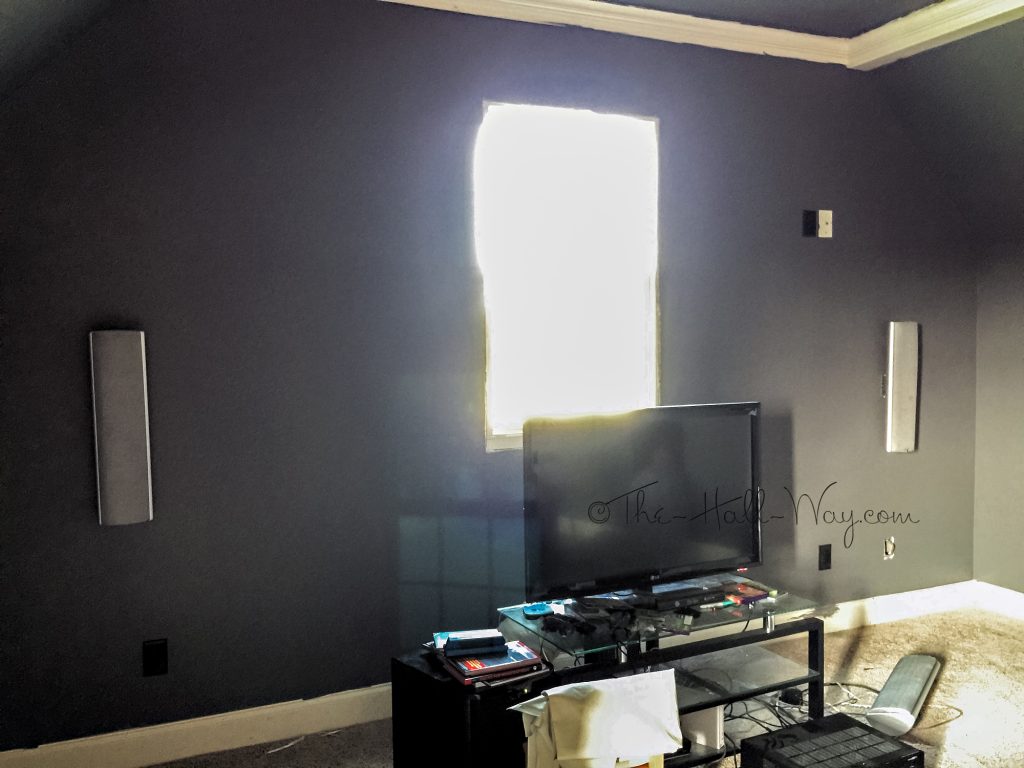
Once the ceiling and walls were painted, we were able to hang the speaker mounts and hook up the speakers to the newly run wires. (Please note that the trim still needs to be painted)
I also forgot to mention that we changed all the outlets and switches from ivory to black. A little detail that makes a difference.
While painting the walls, we also painted the inside of the new wall cabinet. David installed jacks for all the wires.
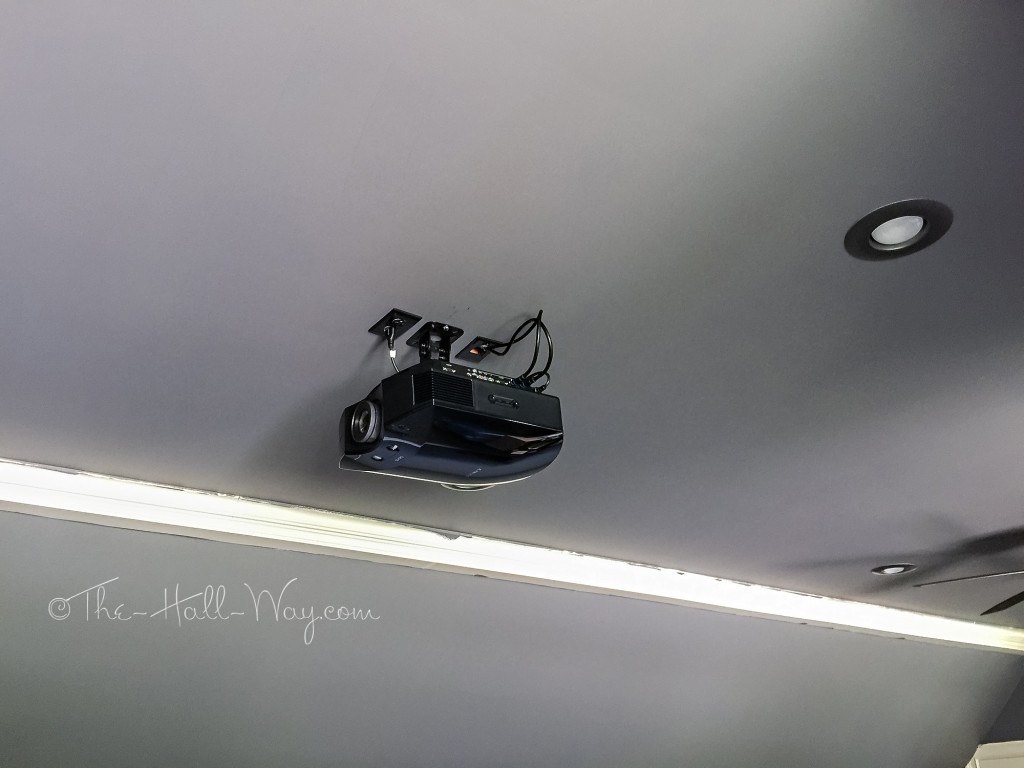
The projector beat the screen to the house, so we got it hung with the new mount David had ordered.
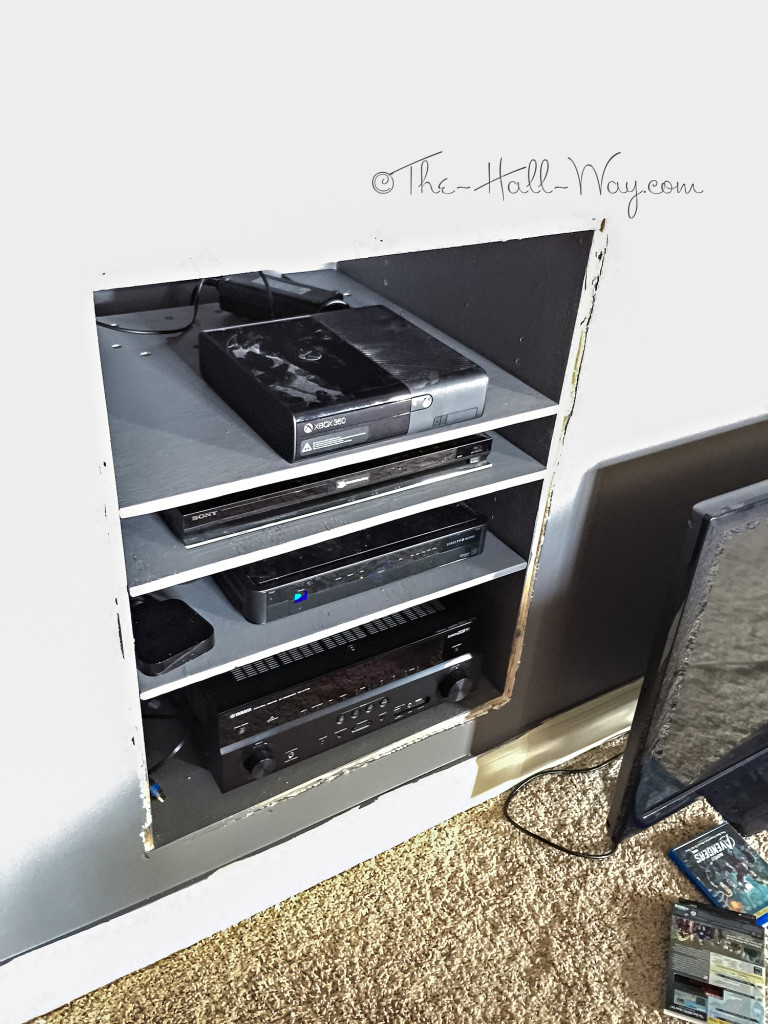
He drilled shelf peg holes in the cabinet walls and built shelves for the electronics. There is a cutout in the back for the wires to run and he drilled extra holes for ventilation. All it needs now is some trim (and to be dusted!)
Since our screen didn’t arrive when expected, we made our own temporary screen. We stapled some extra blackout fabric I had to some scrap lumber and created ~106″ screen. A bit smaller than the one we ordered, but it gave us something to test the projector with.
The projector worked great straight out of the box. We’ll just have to do a few minor adjustments once the real screen gets here. We finally got to try out some of the 3D Blu-ray movies we have.
Hopefully, the screen will be here this week and I’m going to start working on the trim paint. That’s going to be a tedious job because there is a lot of it. I’ve been looking for blackout curtains to replace the roller shades and will try to get those this week as well. Once that is all done, we will need to build the platform for the recliners. That will take some work as it’s going to be around 9 1/2′ wide by 11′ deep. The front riser will be about 4″ high and the back riser will be 16″ high. We will have to do most of the assembly in the room because it will never make it up the stairs. We need to decide whether we are going to replace the carpet in the room and what the platform will be covered in. Once that is complete, the chairs will be ordered.
To be continued . . .
Home Theater – Part 1
Well, our work on the home theater started a lot sooner than I expected. David ordered a new AV receiver and things took off from there. We started researching speaker and seat placement and used tape to mark those on the walls.
The blue tape marks the recommended seating range for a 135″ screen. The lines of green tape mark the range for the 2 rear speakers (this picture was taken after we ran the wires).
We decided to cut into the side wall and create a cabinet for the electronics built into the wall. This also gave us access to the attic space so we could run the wires.
Unfortunately, the duct work is mounted lower than we expected so we weren’t able to make the hole (or the cabinet) as tall as we planned.
David cut the stud out in the middle, then reinforced the opening with 2x4s, kind of like a window. We then started the fun task of running speaker and electrical wires. We removed the nearby outlet so that it could be used in the back of the cabinet.
On the front wall, we taped off the screen size and estimated placement so we knew were to run the side speaker wires.
I quickly realized I should probably start looking at paint colors, so I taped a bunch to the walls. Took me a while, but I narrowed it down to these.
The opposite wall has my reject colors. You can see the left rear speaker wires were ran here. We ran them under the baseboard and the carpet along this side. That was pretty much our only option unless we wanted to start tearing the walls apart. Nothing is visible and you’d never know it was done after the house was built by looking at it.
The subwoofer will go near the bottom right of the screen. We removed an unused phone jack and replaced it with the speaker wire. You can see all the speaker wires running below the drywall. They all go into a hole we made in the corner on the right and enter the attic space there.
Getting wires ran into the ceiling was a bit challenging, but it could have been a lot worse. We ran 2 HDMI cables and tapped off another outlet to add a power outlet to the ceiling for the projector. The pencil marks are stud locations.
We also ran a speaker wire and power cord under the carpet to the middle of the floor. The speaker wire is for a future Buttkicker and the power cord is for the recliners and platform lighting.
All the wires and cables end here where a cabinet will be built.
Meanwhile, I had narrowed down the paint colors to one of the following. I kept being pulled towards Behr Marquee Magnet MQ2-61 😉
After going back thru my paint deck, I found a nearby color that I thought would make the perfect combination. Below is Behr Marquee Magnet with Behr Marquee Silver City MQ2-59. I have a speaker cover shown for reference.
Silver City will be the trim color and here I have it next to our main trim color, Behr Ultra Silky White. By itself, Silver City looks light, but as you can see, it’s not too light.
Before we could paint, we needed to remove the trim around the front window since it will interfere with hanging the screen. Fortunately, it came off fairly easily. I am going staple blackout fabric over the window so it will block out the light yet look like a blind from the outside.
You can also see where I painted a sample patch of the new wall color. The old wall color makes it look purple although it’s not.
To be continued . . .
Enjoy The Show
Since we moved in, our bonus room over the garage has been mainly used as a storage unit for us and my parents. It still houses my parents’ home theater chairs, our exercise equipment, random furniture and assorted boxes we cleared out of our real storage unit. Here are some pictures from before we moved in.
The door on the left is attic access. The bathroom door is in the middle of the picture and the door on the right is a walk-in closet.
There is a full bath up there and it’s pretty large. The shower will probably never be used, but I wouldn’t get rid of it for resale reasons.
Here are a couple pictures with some furniture in it. The table set is my parents’ and is now in their house. Dad is still working on their home theater, so we still have their chairs. The Kid watches tv up here. Pretty funny sitting in big recliners watching a 40″ tv 🙂
My “vision” for this room has always been a home theater, so I finally sat down and started working on a design recently. The hardest part was getting the program to draw the roof/ceiling correctly. I finally got it as close as it’s gonna get. Then, I was able to start adding furniture and other details.
I should note that the only accessible attic space is a 2-3′ wide area along the side of the bathroom. Imagine the long right wall of the bonus room continuing all the way to the staircase wall. The piano shown in the bottom dormer is the electric piano my parents gave us as a wedding present. My sister had it for a while after we got our grand piano, but we have it back now that she has my parents’ upright piano. The rectangles near the walls are floor registers.
The closet on the bottom corner is a good size, but the entire ceiling is sloped so you can only walk upright along the one wall. It’s still perfect for storing stuff though. Here’s a closer view of the bonus room area:
Currently, I have the screens just floating in front of the window because they could not be hung on the wall with the window trim still there. I am showing both 120″ and 132″ screens for comparison. We already have speakers for a 7.1 surround system, so those are shown as well. A decision to be made is where to put all the electronics. We have talked about putting them in the closet at the back of the room, but that means running a lot of wires a really long distance. Another option is to cut a hole in one of the side walls and build a knock out for them towards the front of the room. Since the window prevents the screen from being hung on the wall, I have also thought about building a false wall or a wall of cabinets a foot or so from the real wall. Something like this:
The seating is drawn above as sofas, but they’d be actual home theater chairs with 3 recliners per row. The second row is shown on a riser. Here are some “doll house” views.
The little white dots are existing recessed lights. You can also see the existing ceiling fans suspended in midair. At least one of those will probably have to go as it will likely interfere with the projector.
The bathroom and closet are shown in their current colors. I randomly picked the theater room colors just to have something dark for the renderings. I still have no idea what direction I want to go with colors or decorating. I do know the recliners will almost definitely be black leather.
Behind the second row, I’d like to have a bar. I know from experience in my parents’ old home theater that eating in a big recliner, in the dark, isn’t the easiest thing to do. The bar would also give us additional seating, if needed. I need to work on the riser and bar design on paper so I can see how the heights will all work together.
On the back wall, I’ve added a wet bar with fridge drawers and a microwave. Plumbing for the sink should be relatively easy as the bathroom sink is on the other side of that wall and the plumbing is accessible from the attic access to the left of the bar. Again, I have no idea on the cabinet, countertop or backsplash colors yet.
Finally, here are some 3D views. The dormers have my walls messed up a bit which is why you can see the studs along those walls. This first image is standing near the top of the stairs outside the bathroom door.
The sloped areas are actually part of the walls, but the program considers them part of the ceiling. The slopes would actually be the wall color. The triangle along the right wall isn’t really there either. The ceiling is 9′ and the side walls are 6′ tall.
Below shows a 120″ screen.
Or, here is a 132″ screen. Speaker placement is TBD, but they are all shown to scale (and they are really silver).
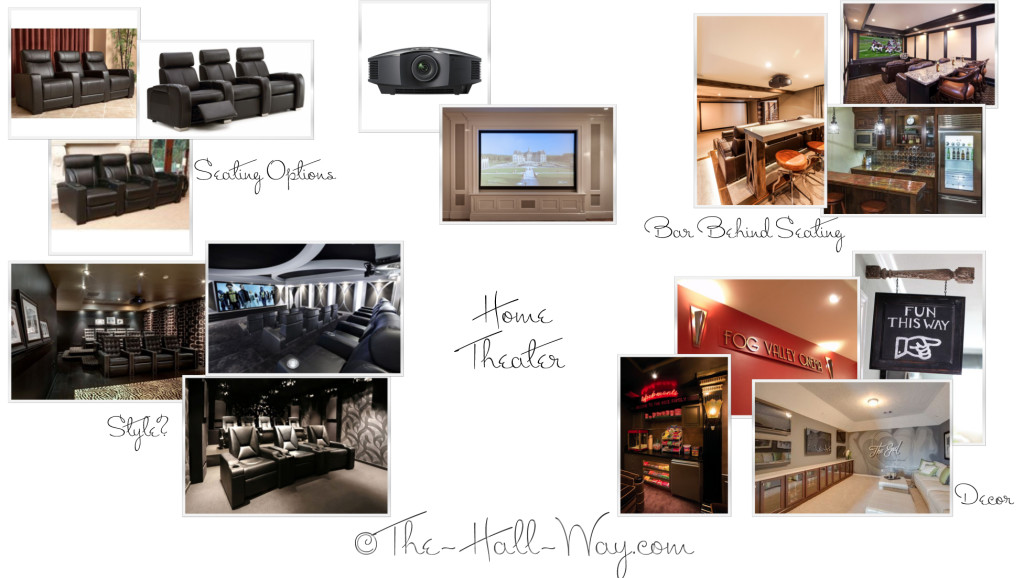
I threw together a design board to show some of my ideas from my Pinterest boards. I’d like to do some sort of Theater sign above the staircase door downstairs. Maybe an “Enjoy The Show” sign on the staircase going up and an “Exit” or “The End” sign going down. The staircase could use some more lighting, so I’d like to change out the recessed light over the landing to a group of pendants or something similar. Ideally, I’d get rid of the light beige carpet, but it’s still in excellent condition so ripping it out will be hard to justify. My main dilemma is wall colors and whether to have a “theme” or not. We are auto racing fans, so that’s a theme that’s been mentioned. Or, just cars in general. I’ve also considered going with a rustic vibe. Or, it will most likely just end up being a non-themed room like the rest of the house. I would like to do something fun to the bathroom. We shall see.
Roses Are Red
. . . and many other colors in my garden! More on that in a minute.
I’ve been trying to figure out where I left off since I’ve neglected this blog for way too long. I’ve worked on several projects around the house, but none that have been really 100% start to finish. The new wood floors in our Master Bedroom have been done for a while, but I still need to fill, caulk and paint the shoe moulding around the room. Not something most people would notice (and no one really goes in our room besides us), but it still needs finished.
My Craft Room was painted, I refinished our old office furniture and changed out the knobs, but that’s all that has been done in that room. I still need to decide what I want to do with the daybed in there – paint the existing frame or build a new one. I’m also still trying to find bedding and I need to complete my ideas for decorating the walls. I’ve used the “new” furniture for sewing and paper crafts though and it’s great to have so much more work space. More on that room will come as I finish putting it together.
There have been some other random changes and upgrades around the house which I will document soon in another post.
Back to the roses – once warm weather finally came, I started working on the exterior of the house. I’m not usually successful growing plants, but for some reason, I tend to have good luck with roses. (The opposite of most people, I know). I have added several to the rose garden I started last year. I now have around 20 rose bushes around the house. Most are in my rose garden on the south side of the house. I want to remove the holly in the middle, but I’m afraid it will be a lot of work to get out.
I have wanted to label my roses for a while and decided to try a DIY project using clay. It didn’t work out quite as nice as I’d hoped, but they get the job done and no one else really sees them. I pressed the name of each rose into the clay, then baked them for the instructed time. Then I carefully painted inside the letters with craft paint to make them easier to read. Once dried, I sprayed them with a clear coat to hopefully make them more durable. My original plan to hang them didn’t work, so I ended up drilling a hole in the top of each one and made a post out of wire for them to hang from.
This is a climber I planted last year that has done really well. I just have a problem with black spot which seems to be an issue with every climber I’ve had. I’m trying to get this to grow along the air conditioner wall.
It was covered in blooms around Mother’s Day so I made my own bouquet.
I have 3 Laura Bush roses – 2 tree roses and 1 bush. The tree roses are at the bottom of the back stairs. When they are covered in blooms, you can smell them as soon as you open the door.
I now have 2 white roses, Pope John Paul II and John F. Kennedy. The “Pope” I’ve had since the other house.
A huge bloom that opened up inside the house.
Another new one is Stainless Steel. I had been wanting to get a “silver” rose for a while and found this at a local nursery. The blooms start off pink-purple, but get more gray/silver the longer they are open. They have a nice smell as well.
Here are 2 Stainless Steel with Blue Girl (which also leans purple but turns more blue as it gets older).
About Face is one of my new favorites. The outside of the petals are a dark coral with yellow-orange on the inside.
I was really excited to get Dark Night. They are an almost black-red with a yellow-cream reverse. I have one in the ground and one in a pot (the one in the pot is doing the best, of course). Unfortunately, the blooms on this don’t last long.
I have a new bright red one called Veteran’s Honor. It just recently bloomed and is gorgeous. The blooms are lasting quite a while and they have a sweet smell.
I also planted 3 blueberry bushes to see how they’d do. One is covered in blueberries which are still a ways from being ripe.
We planted 5 Japanese Maples last year. 3 of them have died although one is now growing out from the ground. I need to decide what to do with it because I’m not crazy about leaving the 6′ tall dead tree above it.
The one Japanese Maple that is still alive actually produced several new sprouts around it. I left them alone for a couple months to see how they’d do, then I just transplanted them to pots a couple days ago. It will take some work, but it will be awesome if these eventually grow into trees!
My “theme” for the back patio is centered around galvanized tubs and pails which I am using for planters. I’ve picked them up at Lowe’s and Tractor Supply and they are a lot cheaper than normal planters and pots. On the back porch, I reinvented some pots I put together several years ago. The old version was a irregular shaped ceramic pot with a glass hurricane in the middle. The new version is a galvanized tub with a rustic lantern in the middle. (Lantern from Old Time Pottery). The lantern is actually sitting on an upside-down stainless dog dish to elevate it up a bit. I planted Rose Moss around it, which I like for it’s continuous blooming all summer.
I also replaced my clearance fountain, which was looking worse for wear, with a metal leaf fountain. Our neighbor’s honey bees liked the old fountain as a source of water and it seems a few like the new one as well.
He recently gave us a jar of honey with the comb in it which is pretty cool (and tasty)!
I have a couple more posts in the works regarding some other updates around the house and plans for the future. I have several projects I want to start, but even more I should finish first. The craft room and master bedroom need finished. I still have some ideas to complete The Kid’s room. I bought some new cushions for the patio furniture, but haven’t been able to find the correct size for the back porch furniture. I ordered foam this morning to make my own and need pick up some fabric to cover them. I foresee more sewing in my future 😛


