Master Closet – Part 1
I began demo on our master closet this week. With no dressers in our bedroom, the wire shelves alone weren’t going to cut it for long.

Our room is full of boxes and bags of clothes since there was no good place to put them. (Now, it’s even worse since the closet’s been emptied.) After designing our dream closet for the new construction house, I was hoping to do something similar here. This closet was a bit more challenging since it is smaller and has several obstacles I had to work around. The left wall has 2 large breaker boxes and an access panel for the coax wiring plus an outlet. There is an air register about a foot from the right wall along with the light switch and water heater control panel.
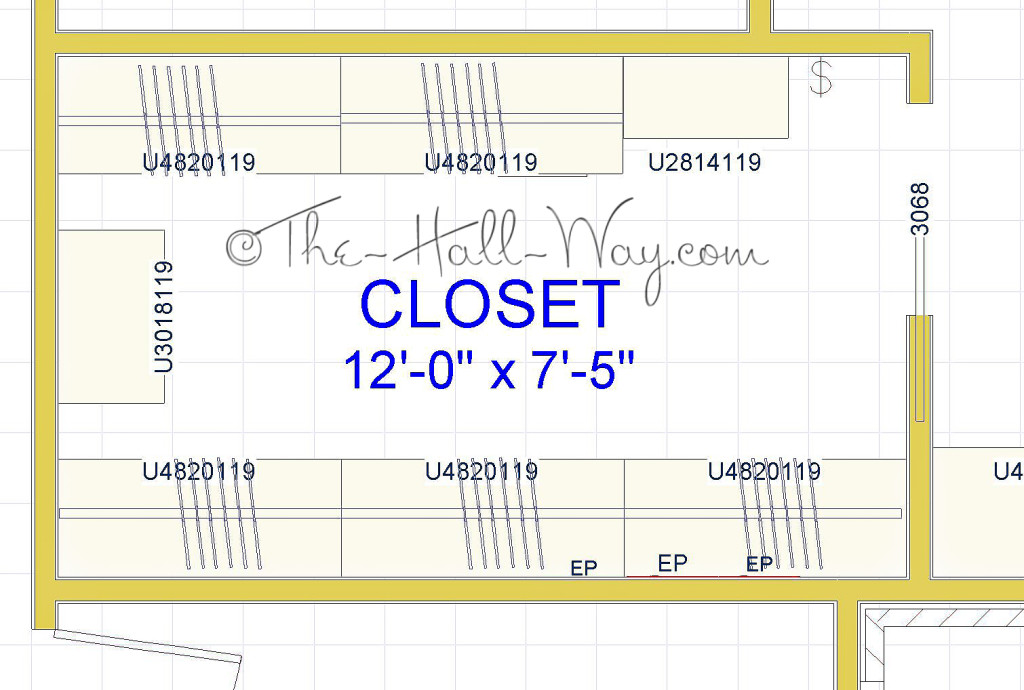
Obviously, the breaker boxes need to remain accessible, but leaving that part of the wall empty wasn’t an option given the size of the closet. After some trial and error, below is what I came up with.
There are 5 – 48″ wide cabinets, a 28″ wide cabinet and a 30″ wide cabinet at the end. They will all go up to the 10′ ceiling.
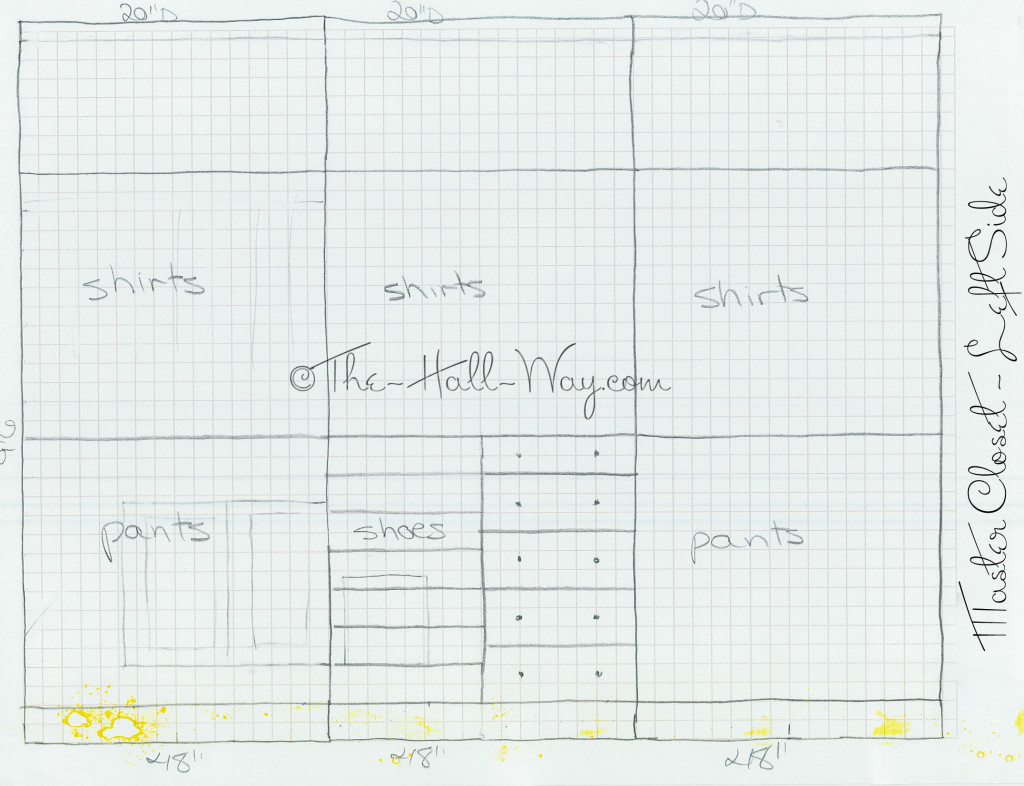
The first cabinet on the left wall will have 2 hanging sections. I will cut the back of the cabinet out around the breaker boxes so we can push the clothes to the side to access them (you can see where I faintly drew them in). The middle section will have shelves on the bottom left side that we can remove if we need to access the coax box. The right half will have drawers. The right section also had to have hanging areas on the top and bottom since it will be partially blocked by the cabinet at the end of the room (obviously, drawers wouldn’t have worked here).
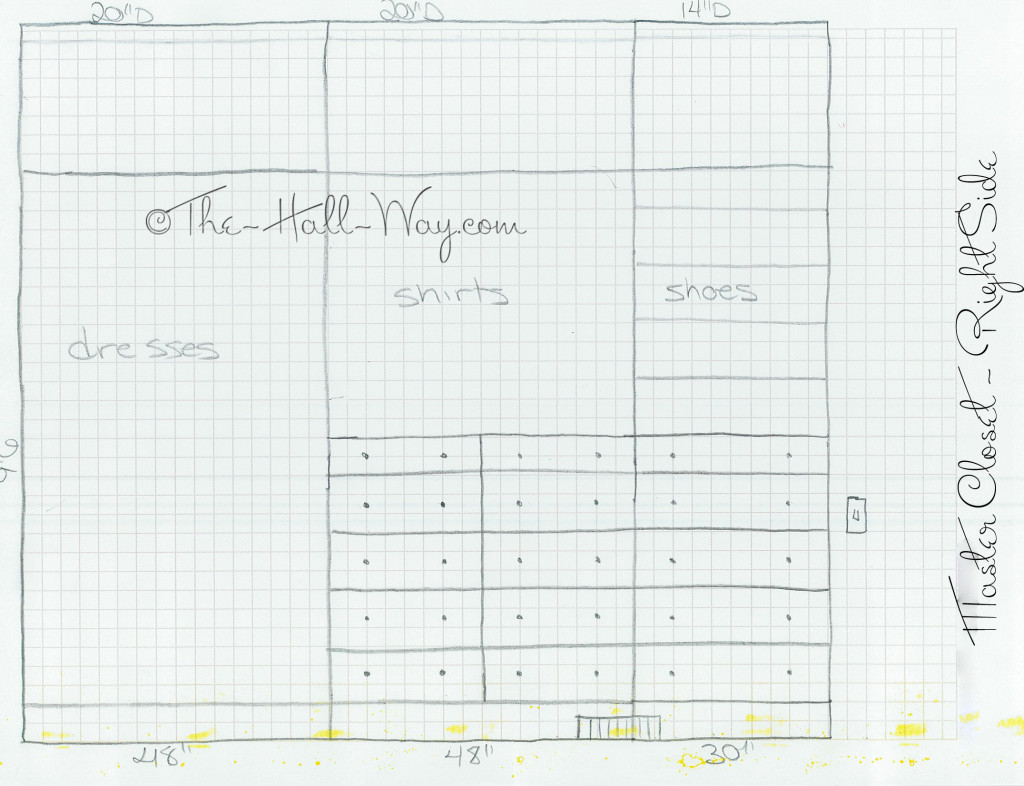
The right wall has a long hanging area, again, where the end cabinet would have blocked drawers. The middle section is all drawers on the bottom. The right section will only be 14″ deep instead of 20″ like the rest, since it will be right in front of you as you come in the door.
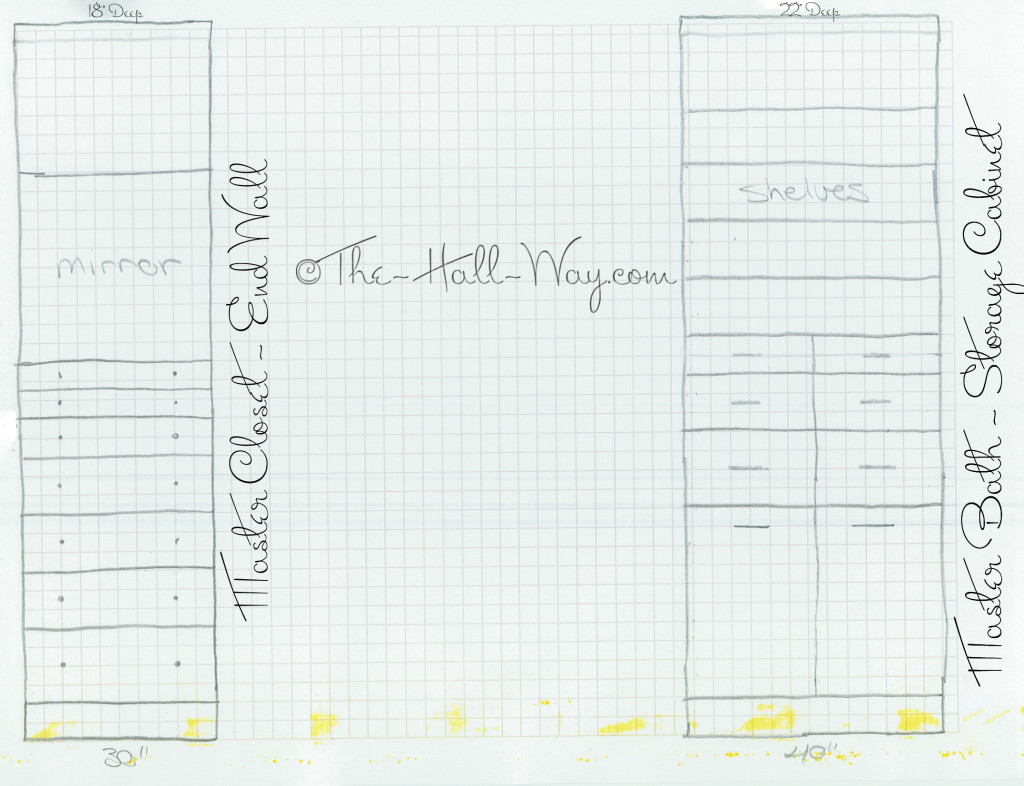
At the end of the room will be a 30″ wide by 18″ deep cabinet that will be mostly drawers with a mirror above (see inspiration pic below). The cabinet on the right side of this page will be in the bathroom outside the closet door. There is some empty space there that is perfect for a cabinet. The bottom 2 big drawers will be hampers and the other drawers and shelves will be towel and linen storage.
First, I had to spend several hours removing the wire shelves. Tip – Don’t ever install wire shelves unless you plan on leaving them there forever! You’re better off leaving the closet empty. They are a royal pain to remove and you end up with a million holes that have to be patched.
One question was what to do with the floor? I wasn’t crazy about installing basically permanent cabinets on the carpet. One, for stability reasons and because the closet carpet tends to get worn down the middle since that’s the only place anyone walks. We could put wood in there, but we don’t know what we are going to do with the wood in the rest of the house and I would want it to match. Lowe’s sells our bathroom tile still, but I wasn’t crazy about continuing it into there.
Meanwhile, our entire closet was painted the trim color that is throughout the house. I’ve chosen Behr Ultra Silky White as the new trim and ceiling color. It is close to the kitchen cabinet color I have picked and is much more white. I repainted the closet ceiling with Silky White flat ceiling paint and will paint the cabinets and trim I build the same color. You can see how much whiter it is in the picture below.
For the walls that will remain visible (which isn’t much), I picked just a color I liked. I don’t know what we will end up doing with the bathroom, but this color will work with anything I’m likely to use. Here’s a preview of what’s to come . . . 


0 Comments
Trackbacks/Pingbacks