Blog
DIY Patent Art Using Silhouette Sketch
We finished up all the painting – walls, ceilings and trim in the Dining/Piano Room, Master Bedroom and The Kid’s Room. (I still need to paint the upstairs doors, as you can see below). In The Kid’s room, I painted one wall with chalkboard paint.

I used Rustoleum’s Chalkboard paint in Black. It went on pretty easily, although it is runnier than regular wall paint so I had to be more careful about drips. I used a regular roller and brush although I wonder if it would have been better to roll over it with a foam roller to smooth it out more. It looks good, but it is a little “rougher” to write on than I would have liked. The instructions said to let it cure for 3 days, than run the side of a piece of chalk all over the surface, then erase it off to season the surface. We have written on it a little bit, but I have some ideas I want to try. I’d like to recreate the Snap Circuits logo above his wall board, for one.
This week, I worked on some artwork for his room. Patent Art is pretty popular now, but is pretty pricey to buy. They sell patent sketches for all sort of inventions – instruments, toys, sports equipment, etc. I had seen a light bulb and fan and thought they would be perfect for our future engineer and my design for his room.
Patents are searchable online – http://patft.uspto.gov/netahtml/PTO/index.html. You can often find the patent number on the product or it’s manual. Once you search for a number, you can click on Images near the top of the page to view a PDF of the patent files and drawings. I found drawings for the original Edison light bulb and 3 original motorized fans, so I saved the PDFs to my computer. I cropped and straightened the pages in Photoshop, then saved them as JPG files.
Instead of just printing them on a printer, I thought it would be neat to use the Sketch feature on my Silhouette Cameo Cutting Machine. It works similar to a printer, but normally uses a blade instead of ink. I use it for all sorts of projects – vinyl decals, greeting cards, etc. There is also an option to replace the blade with a pen which creates a hand drawn look. I thought that would be a neat effect for the vintage patent drawings.
It took around 1-2 hours for it to finish each one.
Click HERE to view a quick video of one in process.
I used heavy watercolor paper so that it has some texture. The pen was just an old pharmaceutical pen we had lying around. Since it only outlined the letters, I went back and filled them in by hand.
The finished size is 12×16 (12″ being the widest my machine can do). I picked up some inexpensive metal frames from Hobby Lobby. (There is not a lot of selection in that size, so I’d suggest making them 11×14 instead). I was originally going to paint them silver or another color, but decided to just leave them black. I hung the 3 fan drawings over his new dresser.
Unfortunately, I managed to crack the glass on 2 of them, so I need to get those replaced 🙁
I hung the light bulb drawing above his nightstand. It looks a little high now, but his new headboard will be 6′ tall which will make it look more balanced.
All that’s left to do in his room is build his bed and create some shelves or storage for all his assembled Legos. The dining/piano room is done except for artwork on the walls. Our Master Bedroom is painted and I have our new quilt, but I still need to figure out some details before I can say it’s “done”. Art for the walls, some seating by the window, etc. For now, I have a bunch of stuff to sell on Craigslist – old furniture, baby items, bedding, etc. I need to get it all organized and cleaned up before I post them. Hopefully, that will offset all my recent projects! 🙂
In Progress
Well, I made some decisions after my last post and wanted to share some updates. Since I’m working on 3 rooms at once (which was not the original plan), it’s going to be a bit before they are all 100% finished. I mentioned a recent trip to Home Goods at the end of my last post. Here’s what was right inside the door. . .
A chaise lounge with matching chair (behind) – in neutral fabric! For those of you who have shopped at Home Goods, you know that they tend to have a random collection of stuff. It’s rare to find matching pieces or pieces in neutral fabrics (check out the bright flowered chair in the top left, for example). I frequently see things I like, but have to figure in the cost and work of reupholstering it which always makes it not worth it. Anyway, I jumped on these because they were perfect for the dining/piano room and the price was great for the look. They had also gotten in several chrome side tables in different shapes and sizes, so I grabbed one of those too.
I had taped up some paint chips in the piano room a couple weeks earlier (not anticipating that I’d be buying furniture for that room soon). I decided on Behr Atlantic Shoreline (PPU13-4). We have the walls and ceiling painted (it was a light gray). The large doorway is already painted from when we did the foyer, but the rest of the moulding and window trim still needs painted Behr Silky White (PPU7-12). I also spray painted the legs of the new chairs with black lacquer to coordinate with the piano. The legs were originally slightly different stains with the chair’s legs have a matte, distressed finish. Small change, but it ties everything together better. I’m still on the lookout for a chrome or polished nickel chandelier in that room that won’t break the bank (need one for the foyer too, as you can see).
I previously mentioned that I had purchased a quilt for our room and was deciding on a new wall color. I decided on Behr Silver Setting (PWL-89).
We painted the middle of the tray ceiling with high gloss Behr Silky White. The lower ceiling is flat Silky White, like the rest of the house. Obviously, the trim still needs painted (amazing the difference, huh?). The wall color looks more baby blue than it should, but I think the yellow in the old trim color is causing that.
Here’s the “Before” again, for reference. Needless to say, it’s BRIGHT in there now.
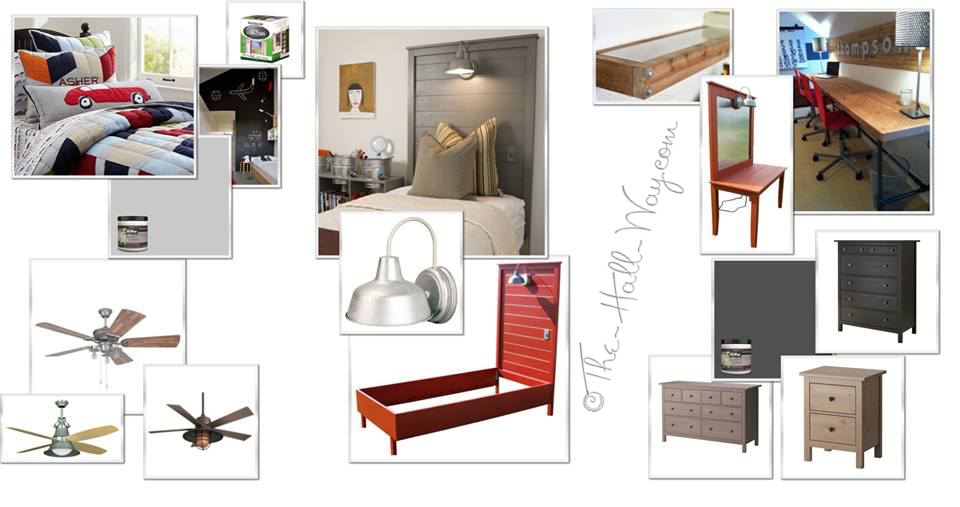
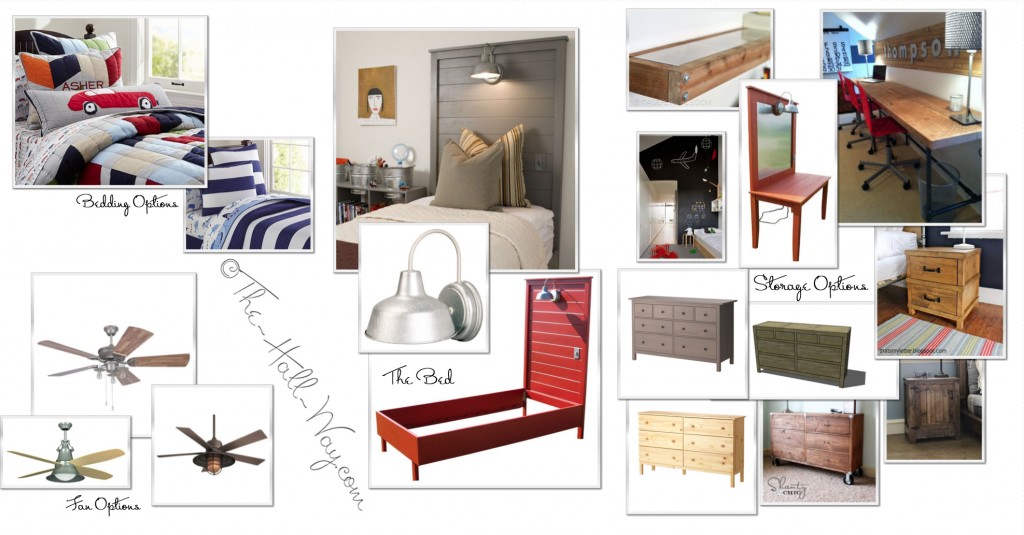
The last room in progress is The Kid’s room. A few decisions later, and here’s the updated design board.
The wall color will be Behr Burnished Metal (discontinued Premium Plus Ultra color – UL260-17) with the door wall being a dark blue chalkboard paint. The quilt is the Landon from Pottery Barn Kids.
I also had to snag the Bulldog pillow because it reminds me of my shadow . . .
I had hoped to make another trip to Ikea in Atlanta, but my parents ended up going after my last post. I had them pick up a couple more pieces for the outside along with 3 from the Hemnes collection. They got back late that night, but when I woke up the next morning, the “Ikea Fairy” had left a stack of boxes in our garage overnight!
I had decided on Behr Cracked Pepper (PPU260-1) for the furniture color, so I had them buy the black-brown stained finish since it is already dark. I laid all the stained pieces around the garage and filled the pre-drilled knob holes with wood putty since I knew I wanted to put pulls on them instead. Once the putty was dry, I sanded it down and began painting. FYI, I did not sand the rest of the pieces, just the drawer fronts that I had puttied. I used oil based paint, so it took 3 days to get them all finished. It takes 24 hours for each coat to dry, so I could only do one a day. I only put one coat on the sides that won’t really be seen (probably could have gotten away with none) – 2 coats on all the visible sides. The long dry time was a pain, but it was worth it for the smooth, extra hard finish.
I assembled the nightstand first. I should note that the color appears to have a green tint in the pictures, but it doesn’t at all in person. It’s probably a combination of my phone camera and the old blue color on the wall behind it. My husband made the lamp for The Kid last year for his birthday based on one we had seen online.
Finding the drawer pulls ended up being a lot harder and more expensive than I expected. I had an idea of what I wanted and thought it would be fairly inexpensive. I need 24, but the stores only had a handful in stock. I bought some at Lowes, I bought some at Home Depot. The finishes didn’t match. I went to another Home Depot and they had a a different finish from the first Home Depot. But, they had enough of them, so I bought them all. I’ll take the rest back. They are actually utility pulls, like for window sashes.
They are a little shinier than I wanted, but I like the final look. In addition to the nightstand, we have the tall 6-drawer chest and the wide 8-drawer dresser.
We’ve already painted the ceiling in his room and I’m planning to start the walls tomorrow. I hope to get the trim in all 3 rooms painted this weekend. It will be a relief to get that done and finally see all the painting done. Next, I’ll start working on his bed which he is really excited about. It will be painted the same color as the dressers.
Colors, Styles and Other Design Decisions
I mentioned my current project ideas in my last post and I posted this design board for The Kid’s room. I’m now trying to make multiple decisions regarding his room and our master bedroom.
 I ordered the bedding on the top left and got one of the shams today so I have something for color reference. Here is his room as it is now (pre-furniture). First picture is the view from the hallway.
This picture is from next to the window.
I want to paint this wall around the bathroom and hall doors with chalkboard paint in either dark blue or dark green. His Snap Circuits board is between the doors, so I thought it would be neat to write “geeky” stuff like equations on the chalkboard around it. The other three walls will be a light gray, blue or some other more neutral color. The key word is “light” because his room currently feels like a cave. The blue is neat, but his room is pretty large (~14′ x 16.5′) and it feels anything but. The ceiling and trim will also get the new whiter color like the rest of the house.
The paint chips on the left are potential wall colors and the chips on the right are potential furniture colors. I think I need to decide on the furniture color first, then pick the wall color since they will be next to each other. The obvious furniture choice is a dark blue, but do I want that with a dark blue chalkboard wall (the bed won’t be against it) or should I do the chalkboard wall in green if the bed is blue? The second choice is a shade of gray like the original bed shown above, but the quilt background is gray and the barn light on the bed will be galvanized steel and I’m worried it will be too much gray. A dark graphite might work though. Black would also work, but his previous furniture has been black and I think I want to do something different. A red that matches the quilt would also work, if I want to go bold. I don’t think I want white in a kid’s room even if I use easy-to-clean paint and I don’t think I can commit to matching the orange or green in the quilt. So, dark blue, dark gray/graphite or red for the furniture?
Regarding the furniture, here is the inspiration bed:
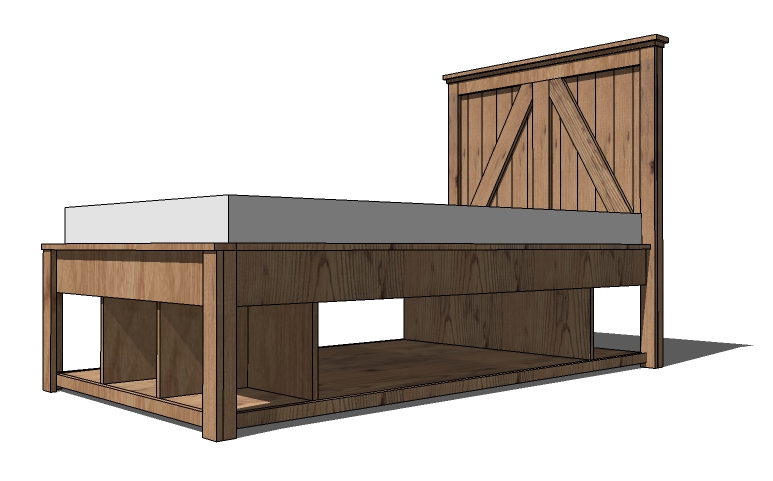
Original price tag for full size = $2000. I think I can make it for a couple hundred. Lowe’s has the barn light in 2 sizes for $29-39. I can get the same switch for ~$4. Plus lumber, paint, etc. I’ve debated long and hard about staining vs painting, but I think painting has won. It will save me a ton of time, money and frustration over staining it. In addition to the paint color dilemma, I’m trying to decide how to build the frame of the bed. Do I keep it simple like the original above or should I build a storage bed like this:
I had originally wanted him to have a trundle bed underneath, but with a daybed and trundle in the extra bedroom that shares his bath, we don’t really need it. Obviously, the storage bed will be more expensive and involved, but it’s still pretty straight forward and drastically simpler than the bed we made for him at our old house. (The headboard will still match the barn light one above). My biggest concern is this bed looking too “heavy”, especially depending on the final color. It will only be a full size which is smaller than the queen he’s currently sleeping on. I also don’t want to cram it full of stuffed animals like we did with his old bed. I’m thinking some galvanized bins or buckets to store things, but keep with the over all style of his room. With the new shelves in his closet and some new furniture to come, he doesn’t really need the extra storage under his bed, but extra storage never hurt. Or we can just go with the plain bed like the original and try to keep the mess to a minimum underneath it ;p Style vs Function . . .
I had also been debating on whether to build or buy his new dresser(s) and nightstand(s), but that turned out to be an easy decision. Buying furniture from Ikea and finishing it to match the bed is, by far, the cheapest and easiest choice. I just need to decide between the Tarva collection or the Hemnes collection. If I paint the bed, we can use either collection (staining would have restricted us to the Tarva since it comes unfinished). The Tarva collection is unfinished and the cheapest, but all the pieces are smaller. The Hemnes collection is more expensive, but the pieces are all larger. Regardless, I will paint them all to match the bed and add matching hardware. I need to figure out what pieces will fit where in his room. I still want to add shelves for his assembled Legos along the half wall and have room for a desk under the window.
I also ordered the quilt for our bedroom and think I narrowed down a wall color. First, I tried the color on the left which is Behr Home Decorator’s Collection Keystone Gray (HSC-AC-21). I decided it was too dark and green. Then, I painted the swatch on the right which is actually our closet color – Behr Salt Glaze PPU12-11. That was better, but I came across Behr Silver Setting PWL-89 and painted the swatch in the middle. The Salt Glaze looks gray until you see it next to Silver Setting.
I also painted the swatches on the wall by the window. It’s hard to see here, but Silver Setting is on the top and bottom and Salt Glaze is in the middle by the light switch and the chip is hanging next to it. Above that chip is the new trim color, Behr Silky White and another wall option, Behr Home Decorators Cotton Gray. I’ve considered doing a neutral color instead of blue on the walls, but don’t know that I want to do that when the main living area is a neutral color too. The other chips are ones I’ve ruled out.
Again, hard to see here, but Salt Glaze is at the top of the picture and Silver Setting is at the bottom next to the quilt. Silver Setting is a close match to the reverse color on the quilt and I think it’s “the winner”.
Our bedroom is also going to be a dramatic transformation.
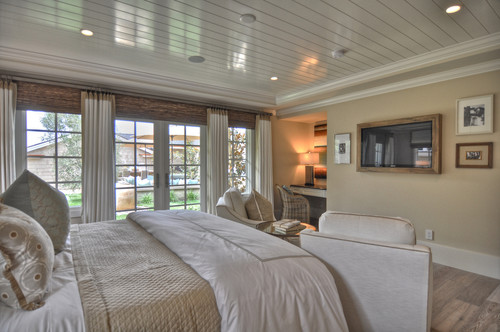
 The ceiling is currently the wall color with a darker shade in the tray. I want to do the complete opposite. Here’s my inspiration:
We’re going to paint the lower part of the ceiling flat Silky White like the rest of the house. The center of the tray is going to have some detail added and will be painted high gloss Silky White. It’s going to be so much lighter in there. Eventually getting rid of the carpet will also change drastically the feel of the room.
I’ve been on the lookout for some accent chairs for the piano room and taped up a few paint chips, but it was low on the list below the bedrooms and waiting for me to find the right furniture for it. A trip to Home Goods yesterday changed that. I try to go once a week or so to see what new stuff they’ve gotten in. They had a bunch of new upholstery pieces and some of them actually matched each other (which is rare there). I ran back this morning and picked up a chaise lounge, matching chair and a small chrome end table. I’m so excited! They fit great in the room and look really nice. Now I’ve got an itch to get that room painted. If I can decide on a color, I may start on the walls tomorrow. (The trim and ceiling also need painted). That room is open to the foyer so everyone can see it from the front door. I’m excited to put my stamp on it and to have a couple places we can sit and look out the front windows. Stay tuned for more on that!
For now, any thoughts on all my color and design dilemmas above???
Snap Circuits Wall
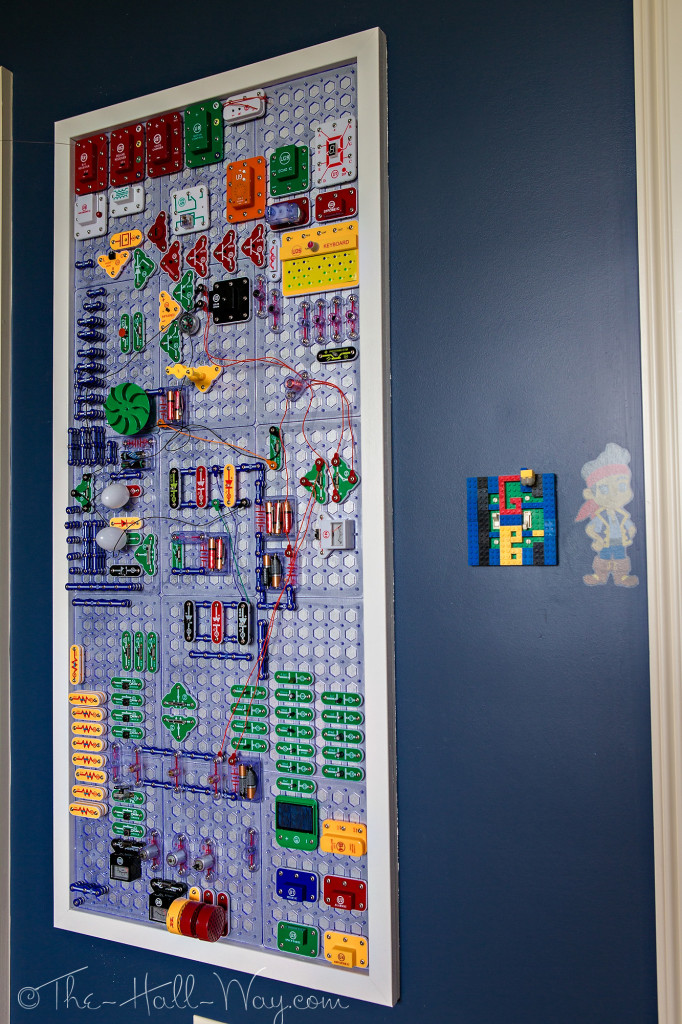
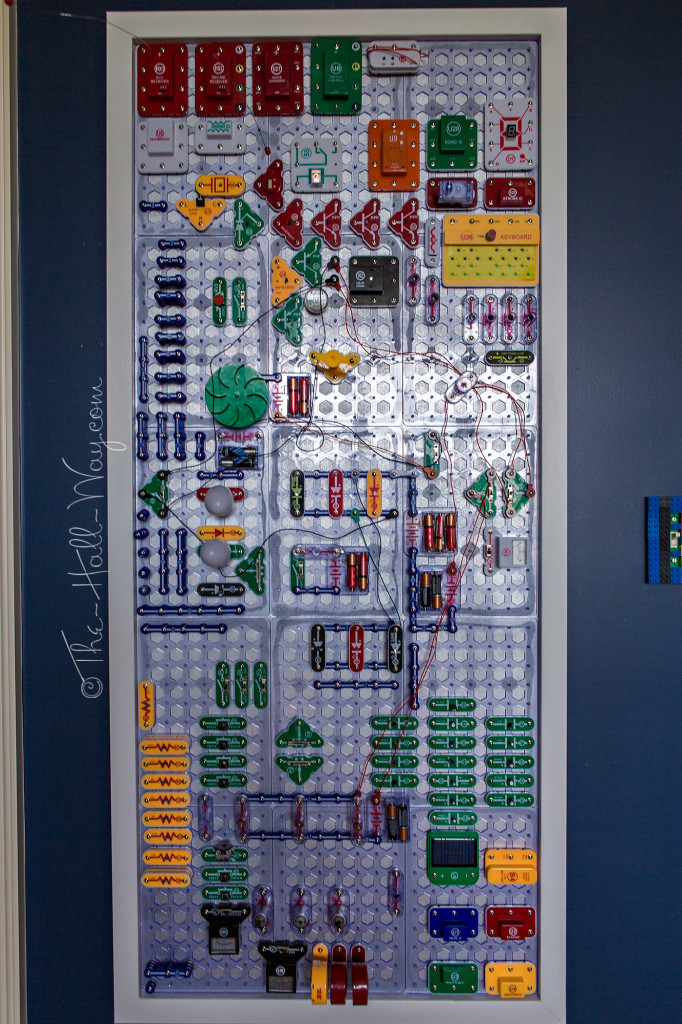
A few years ago, I came across a toy called Snap Circuits while perusing Amazon for Christmas present ideas. The sets contain various electronic parts – motors, lights, switches, resistors, etc. All the pieces have metal snaps so they are easy to connect together into circuits.
The Kid was a little young for them at the time, but I thought it looked perfect for him (and The Husband). It went over so well, I ordered another set a couple weeks later. A couple months later, we needed the storage case for them. Today, he could fill 3 cases and still have loose pieces laying around. They are by far the best toy we’ve ever bought him. He’ll go back to these shortly after opening other presents on holidays. He rarely uses the manuals anymore and creates his own circuits.
Along with that comes hundreds of pieces laying around the house at the risk of being lost. There are tons of ideas for Lego storage and, while Snap Circuits are gaining popularity, I wasn’t able to find any creative ideas for storage for them. I wanted something that would hang on the wall that he could easy stick the parts to and possibly use to build circuits on. My first idea was to find the correct size snap and cover a board or piece of fabric with them. I had a hard time finding the correct size snap and knew that applying hundreds of them, evenly spaced, was not going to be a fun project. The other option was to order several of the base grids and attach them to a board that could be hung on the wall. I knew that would add up the cost fast, but finally decided it was the easiest and best option.
I ordered 15 of the base grids (The Kid still has several loose ones he can carry around and build on). We bought a 1/2″ sheet of MDF and cut it slightly larger than the size of the grids, then spray painted it Metallic Silver. Once it was dry, we used clear glue to attach the grids to the MDF using some of the Snap Circuit connection pieces to keep them lined up and spaced correctly. David screwed the board into the studs, then I framed it with 1.5″ MDF boards which covered the screw holes.
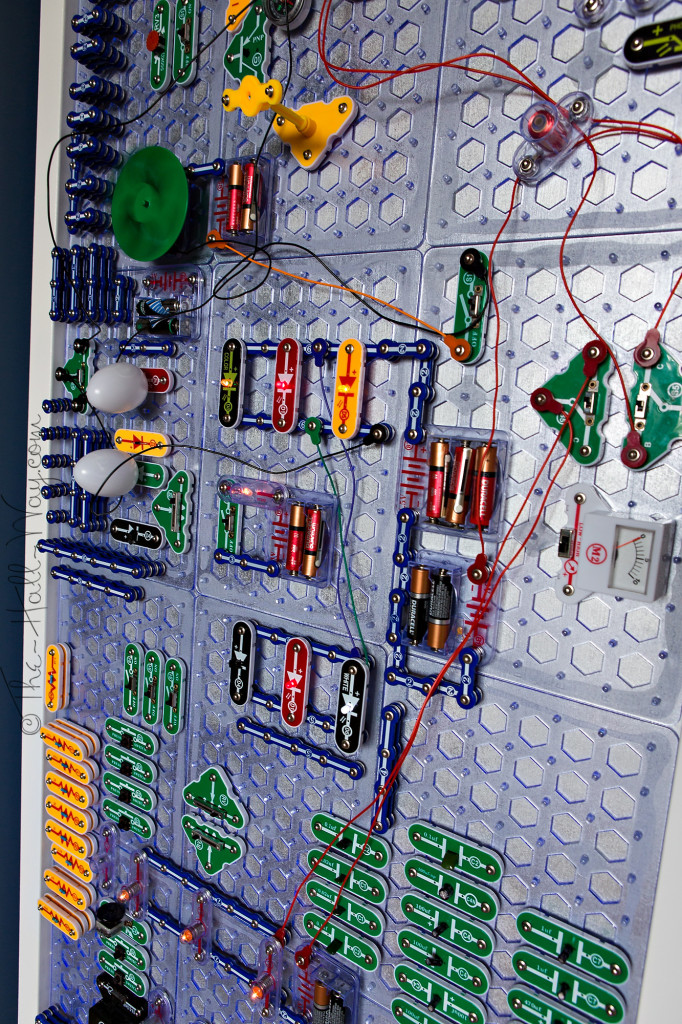
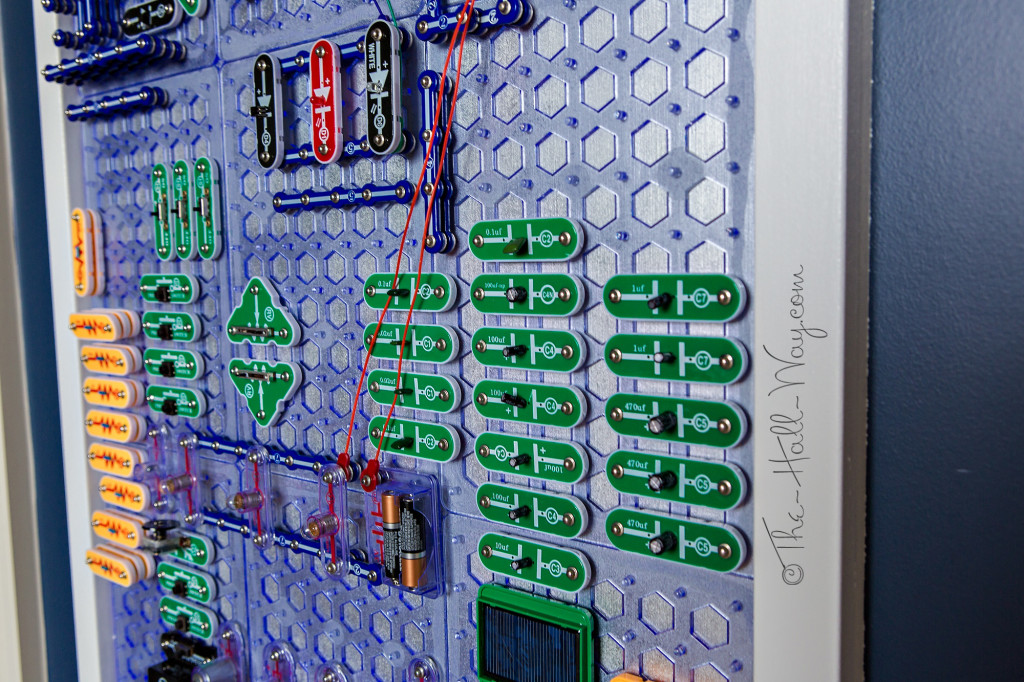
Now his pieces are all on display and he can keep them organized and (more importantly) off the floor. We made it large enough that he has room to build circuits on it as well. He still has his case for travel.
He currently has a large, spread out circuit connected with jumper wires.
I mentioned in my last post that I was working on a design for the rest of The Kid’s room. Below is a design board of my ideas. I’m leaning towards building the bed in the middle. I’m not sure whether it will be painted, stained or what color. I want to paint the wall around the Snap Circuit board with a dark blue chalk board paint. I’m not sure about the other 3 walls, but I know it will be something light. For storage, he will also need new nightstands and at least one dresser. After building all the closet drawers, I’m not sure if I want to build his dressers or buy something. Another option is to buy some wood dressers from Ikea that I can refinish to match the bed I build. If I add matching drawer pulls, everything will match.
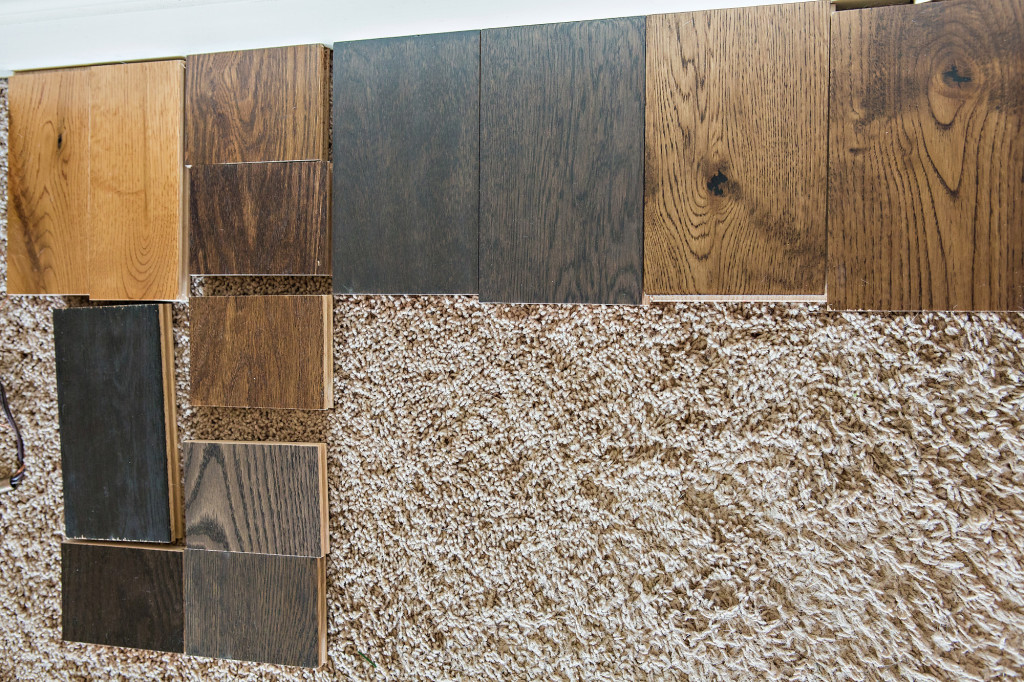
I also think I’ve found bedding for the Master Bedroom so I’m trying to come up with a design scheme to go with it. Meanwhile, I’ve been collecting wood floor samples again. To match the rest of the downstairs, we need oak for our bedroom. For now, it will be a different stain, but if we refinish the rest of the house eventually it will all match. Below are my current top choices.
From top to bottom, left to right – Jasper Wheat Beige (x2), Jasper Charcoal, Bruce Flint Oak
Bruce Tawny Oak Scrape, Bruce Mocha Oak Scrape, Bruce Mountainside Oak Scrape, Bruce Coastal Gray Oak Scrape, Bruce Wolf Run Oak Scrape
Jasper Rainstorm Gray (x2)
Jasper Malt (x2)
I’m currently leaning towards the 2 on the right. I really like the darker gray stain, but I’m not sure that’s a good idea with 2 white Bulldogs. I also like the lighter one on the far right. It’s very neutral and not too dark or light. I’m not sure how soon we’ll get around to replacing the carpet, but it won’t be soon enough 😛
Anyway, not much will get done in the next week or 2 as The Kid is starting school soon. We need to get everything together for the first day of school and get back in the routine.
Eastover Cottage – The Upstairs
Today we’ll take a look at the remaining spaces of our Southern Living Eastover Cottage tour. Click Here to see the previous posts.
The main staircase is by the front door.
The Brazilian Koa flooring continues on the upper balcony which overlooks the Living Room.
The first door at the top of the stairs is the Guest Room.
The upper bedrooms have strand bamboo floors from Costco and the walls are Sherwin Williams Sea Salt.
The Guest Room has a walk-in closet and shares a bath with the Craft Room.
The closet has small access doors to the attic.
Each room has it’s own vanity separated from the rest of the bathroom by pocket doors.
The vanities and tile flooring were purchased at Costco.
The other vanity shares the space with the bathtub.
The Craft Room also has access to the attic spaces and a walk-in closet.
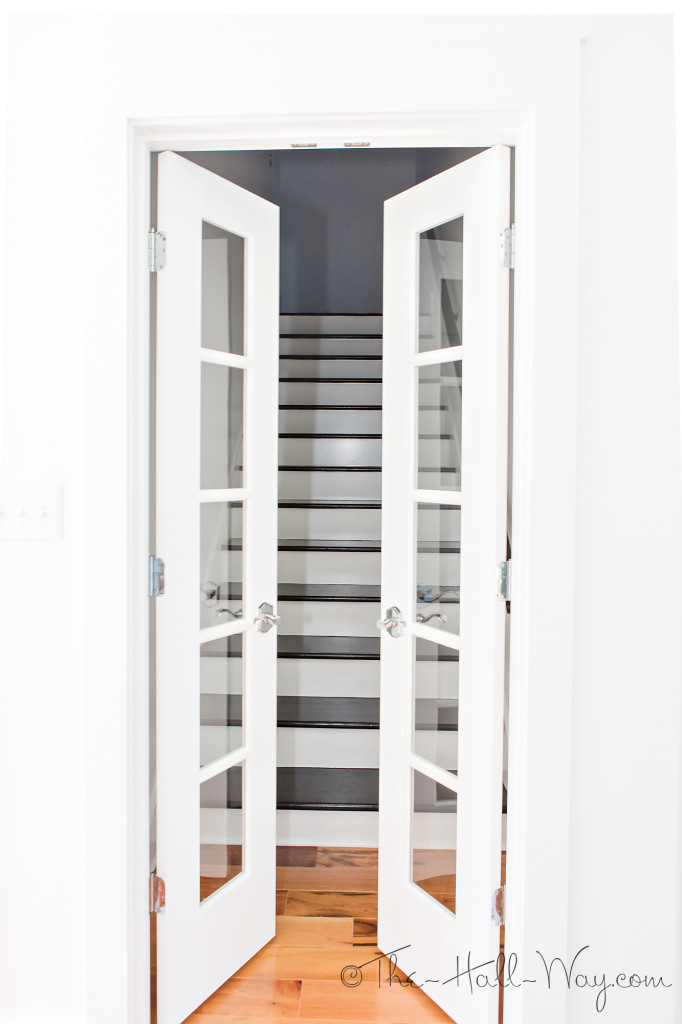
Back downstairs and behind the kitchen is the staircase to the bonus room over the garage which will be used as a home theater.
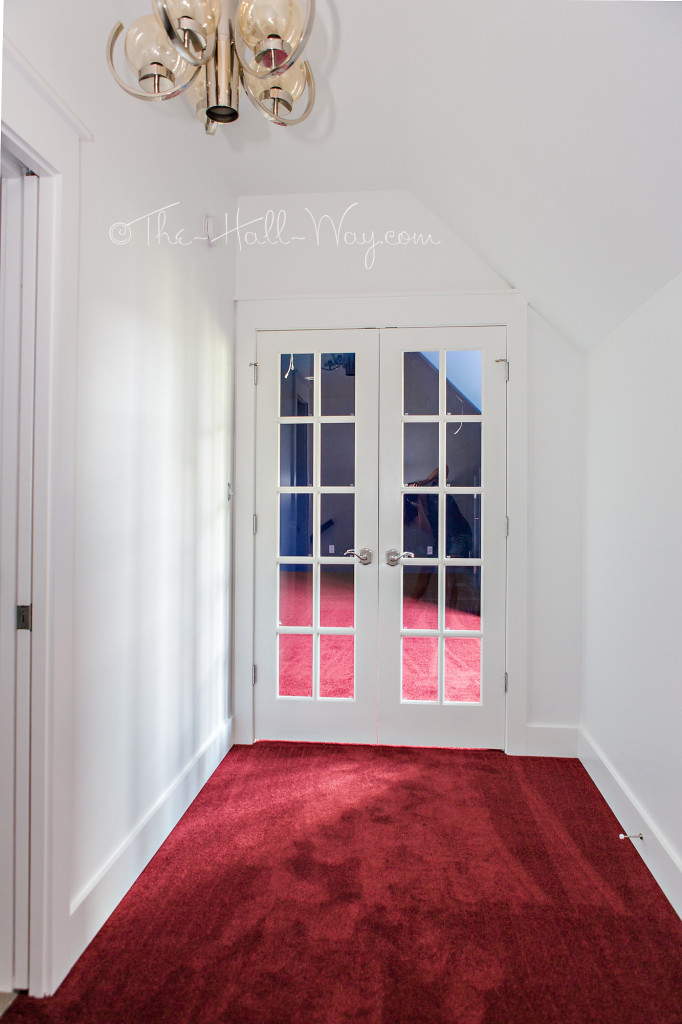
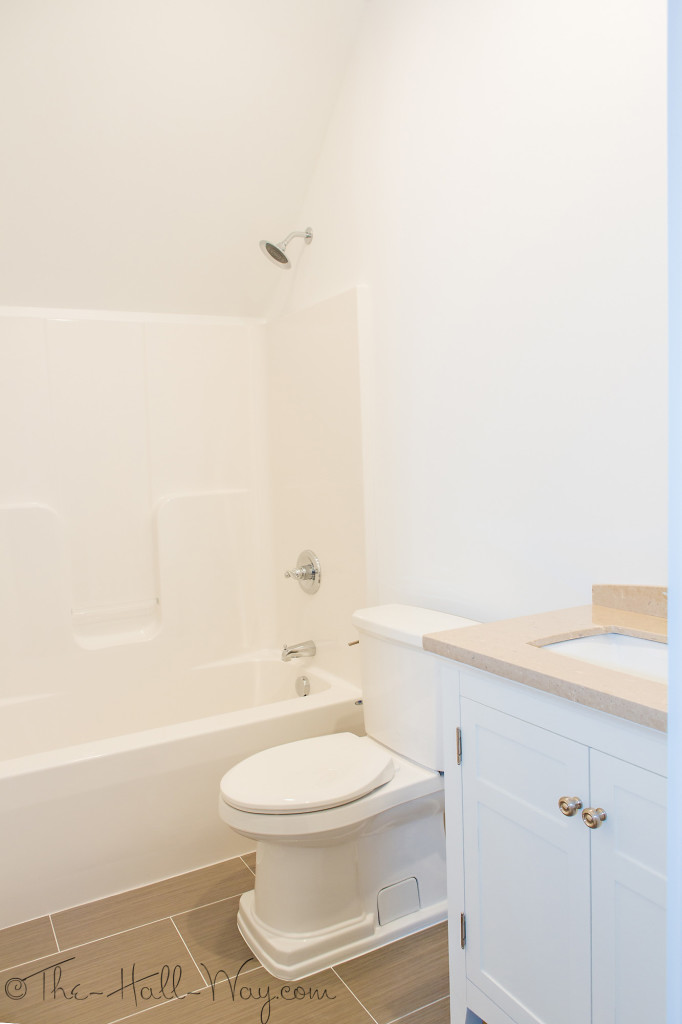
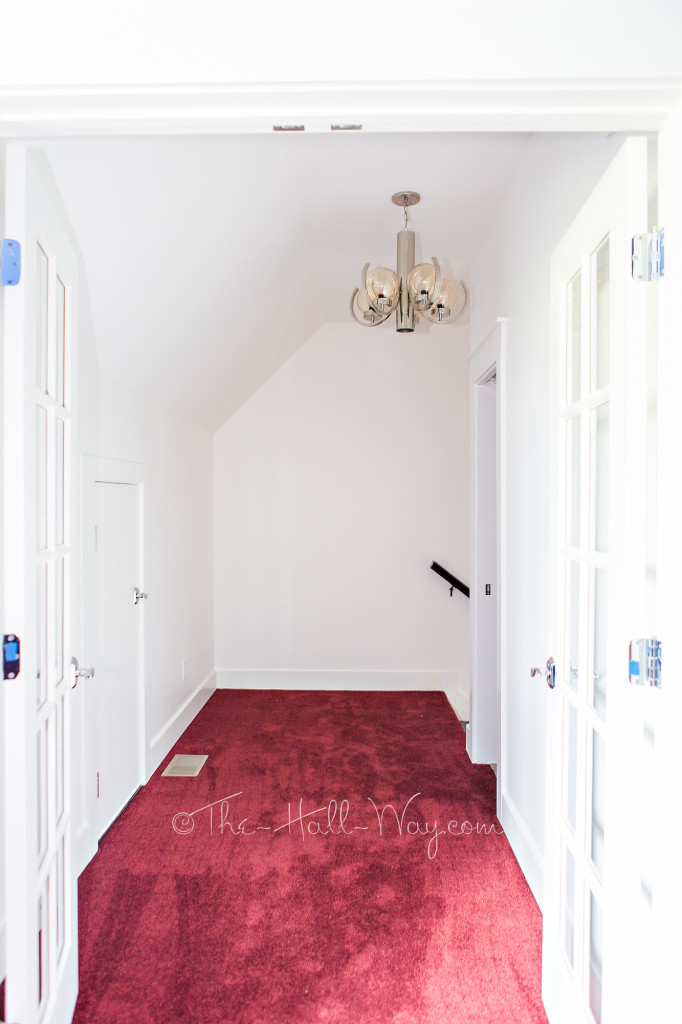
At the top of the stairs is a small hallway with a full bath and attic access. The light fixtures were originals in my parent’s previous 1960s lake house.
The vanity was purchased from Lowe’s.
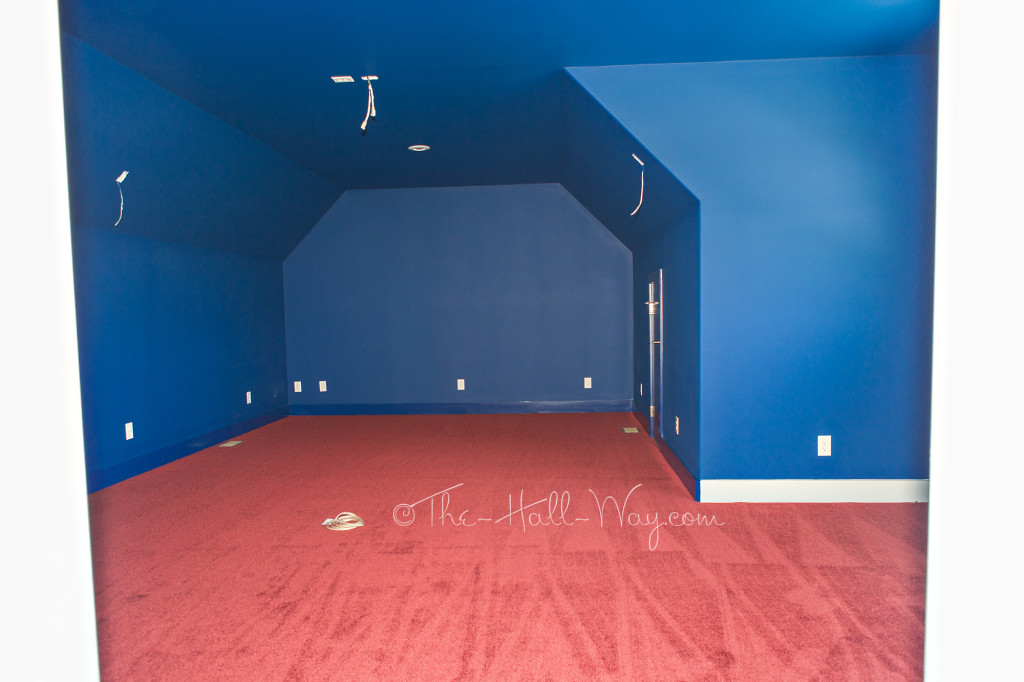
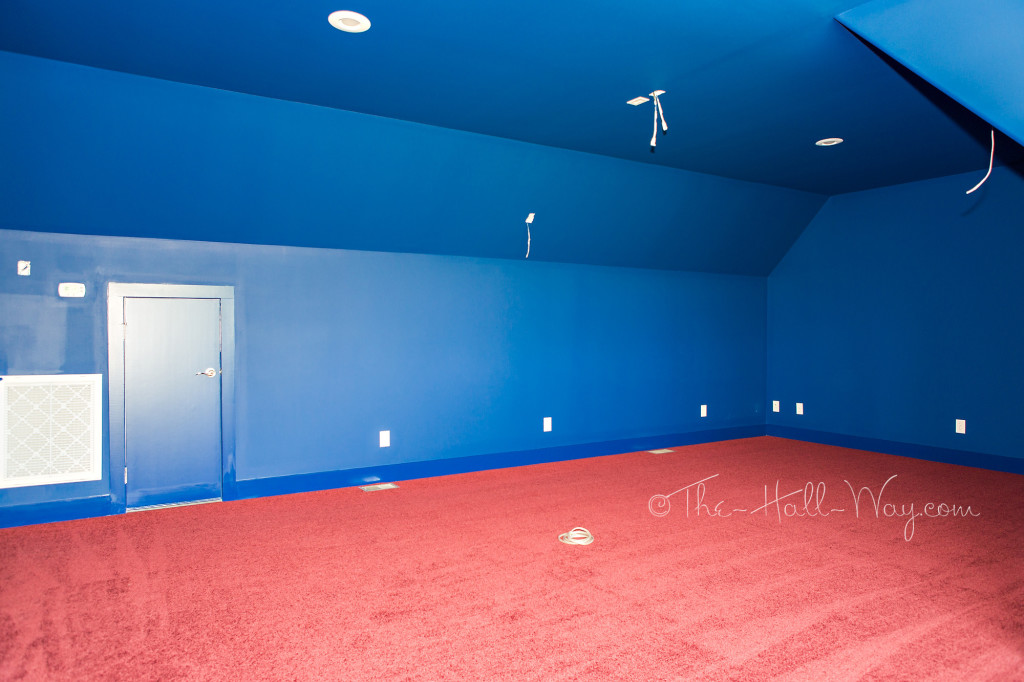
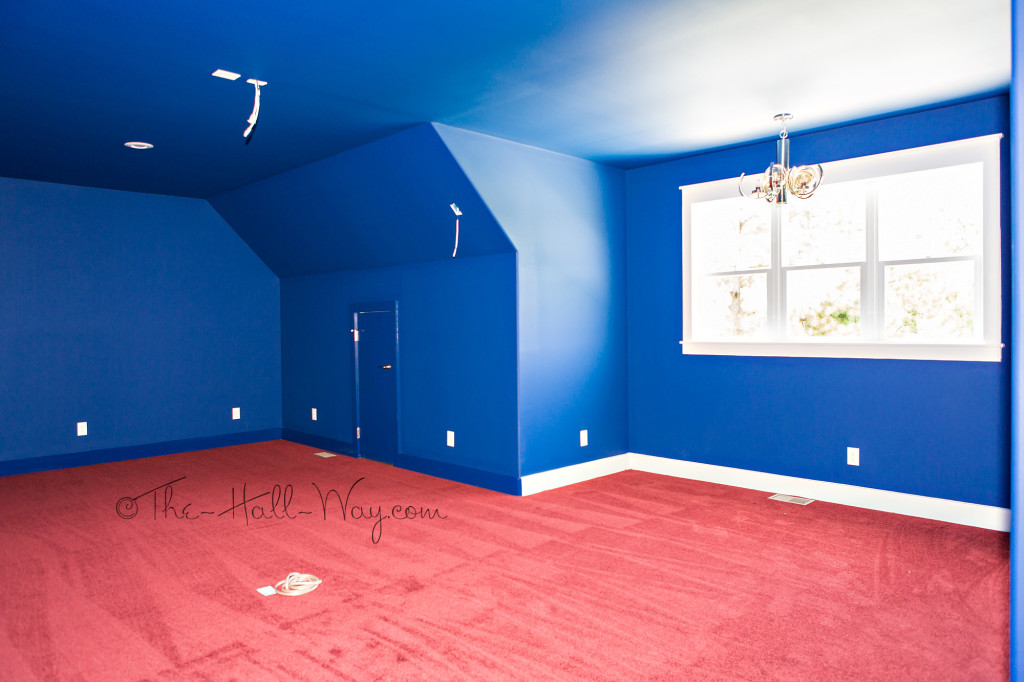
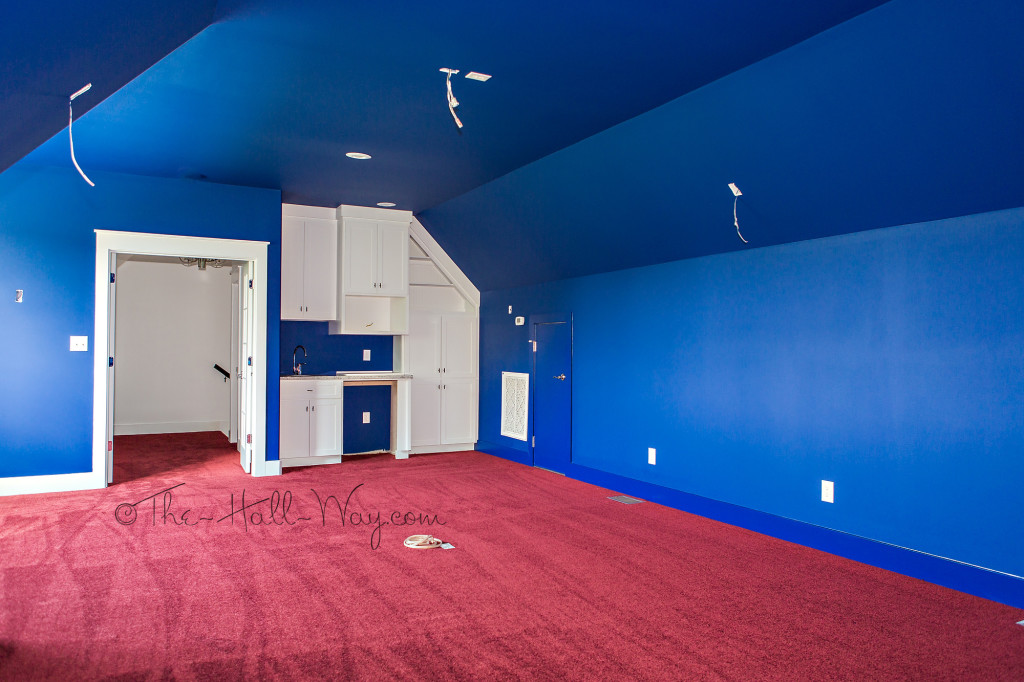
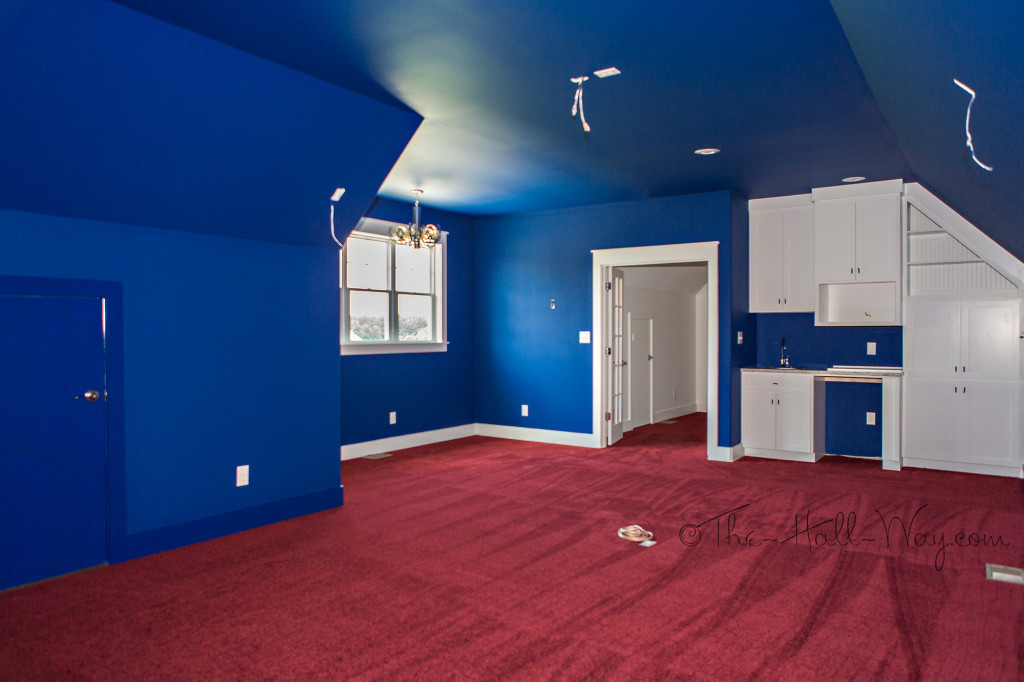
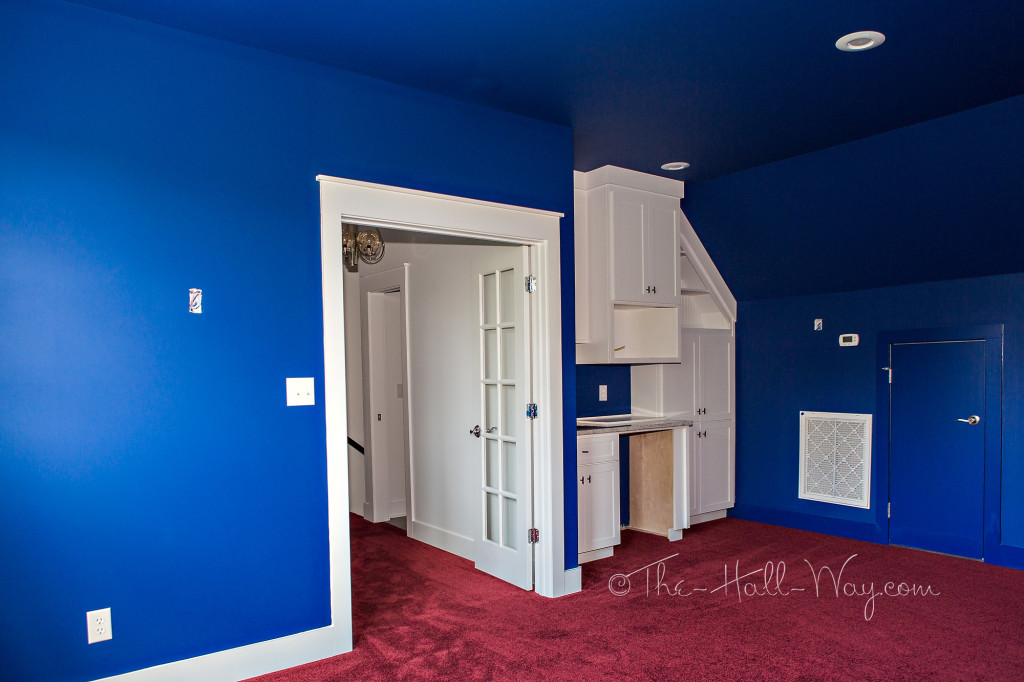
Thru the french doors is the home theater space. The blue is a lot darker than it appears in the pictures (Sherwin Williams Indigo), but I had to lighten it so you can get an idea of the space.
My dad has wires ran for all his speakers and electronics. He will be installing a platform in the middle of the room for the theater chairs.
There is a wet bar at the back of the room next to the entry. A fridge and microwave still need to be installed.
Here’s a view looking back out towards the staircase. The full bath is on the right before the stairs.
I hope you enjoyed the tour! My parents are now trying to get settled and recover from the building process 🙂 Next up on my list:
- Finish a special project for The Kid’s favorite toys. Stay tuned for a post on that.
- Get The Kid back in school. Summer is almost over already!!!
- Start work on The Kid’s room. I’ve finally found a direction that I am excited to start working towards. I’m going to work out the details while we prepare for school to start and hopefully start putting it all together once we get back into the school routine. More on that to come.
- Narrow down flooring choices for our master bedroom and continue looking for design inspiration for that room. It’s the only room on the main floor that still has carpet and it needs to go. The rest of the house has site-finished oak floors and I plan on continuing the oak floors into there, but use something with a factory finish in a different stain. Our future plans involve refinishing the rest of the house to match. I’m also still in search of bedding that will determine the overall look of the whole room. I keep gravitating towards something elegant or similar to the Powder Room, but I’m not sure that’s the way I want to go. I think I’d like something more relaxed or casual. We shall see…


