Blog
Home Theater Bath – Part 2
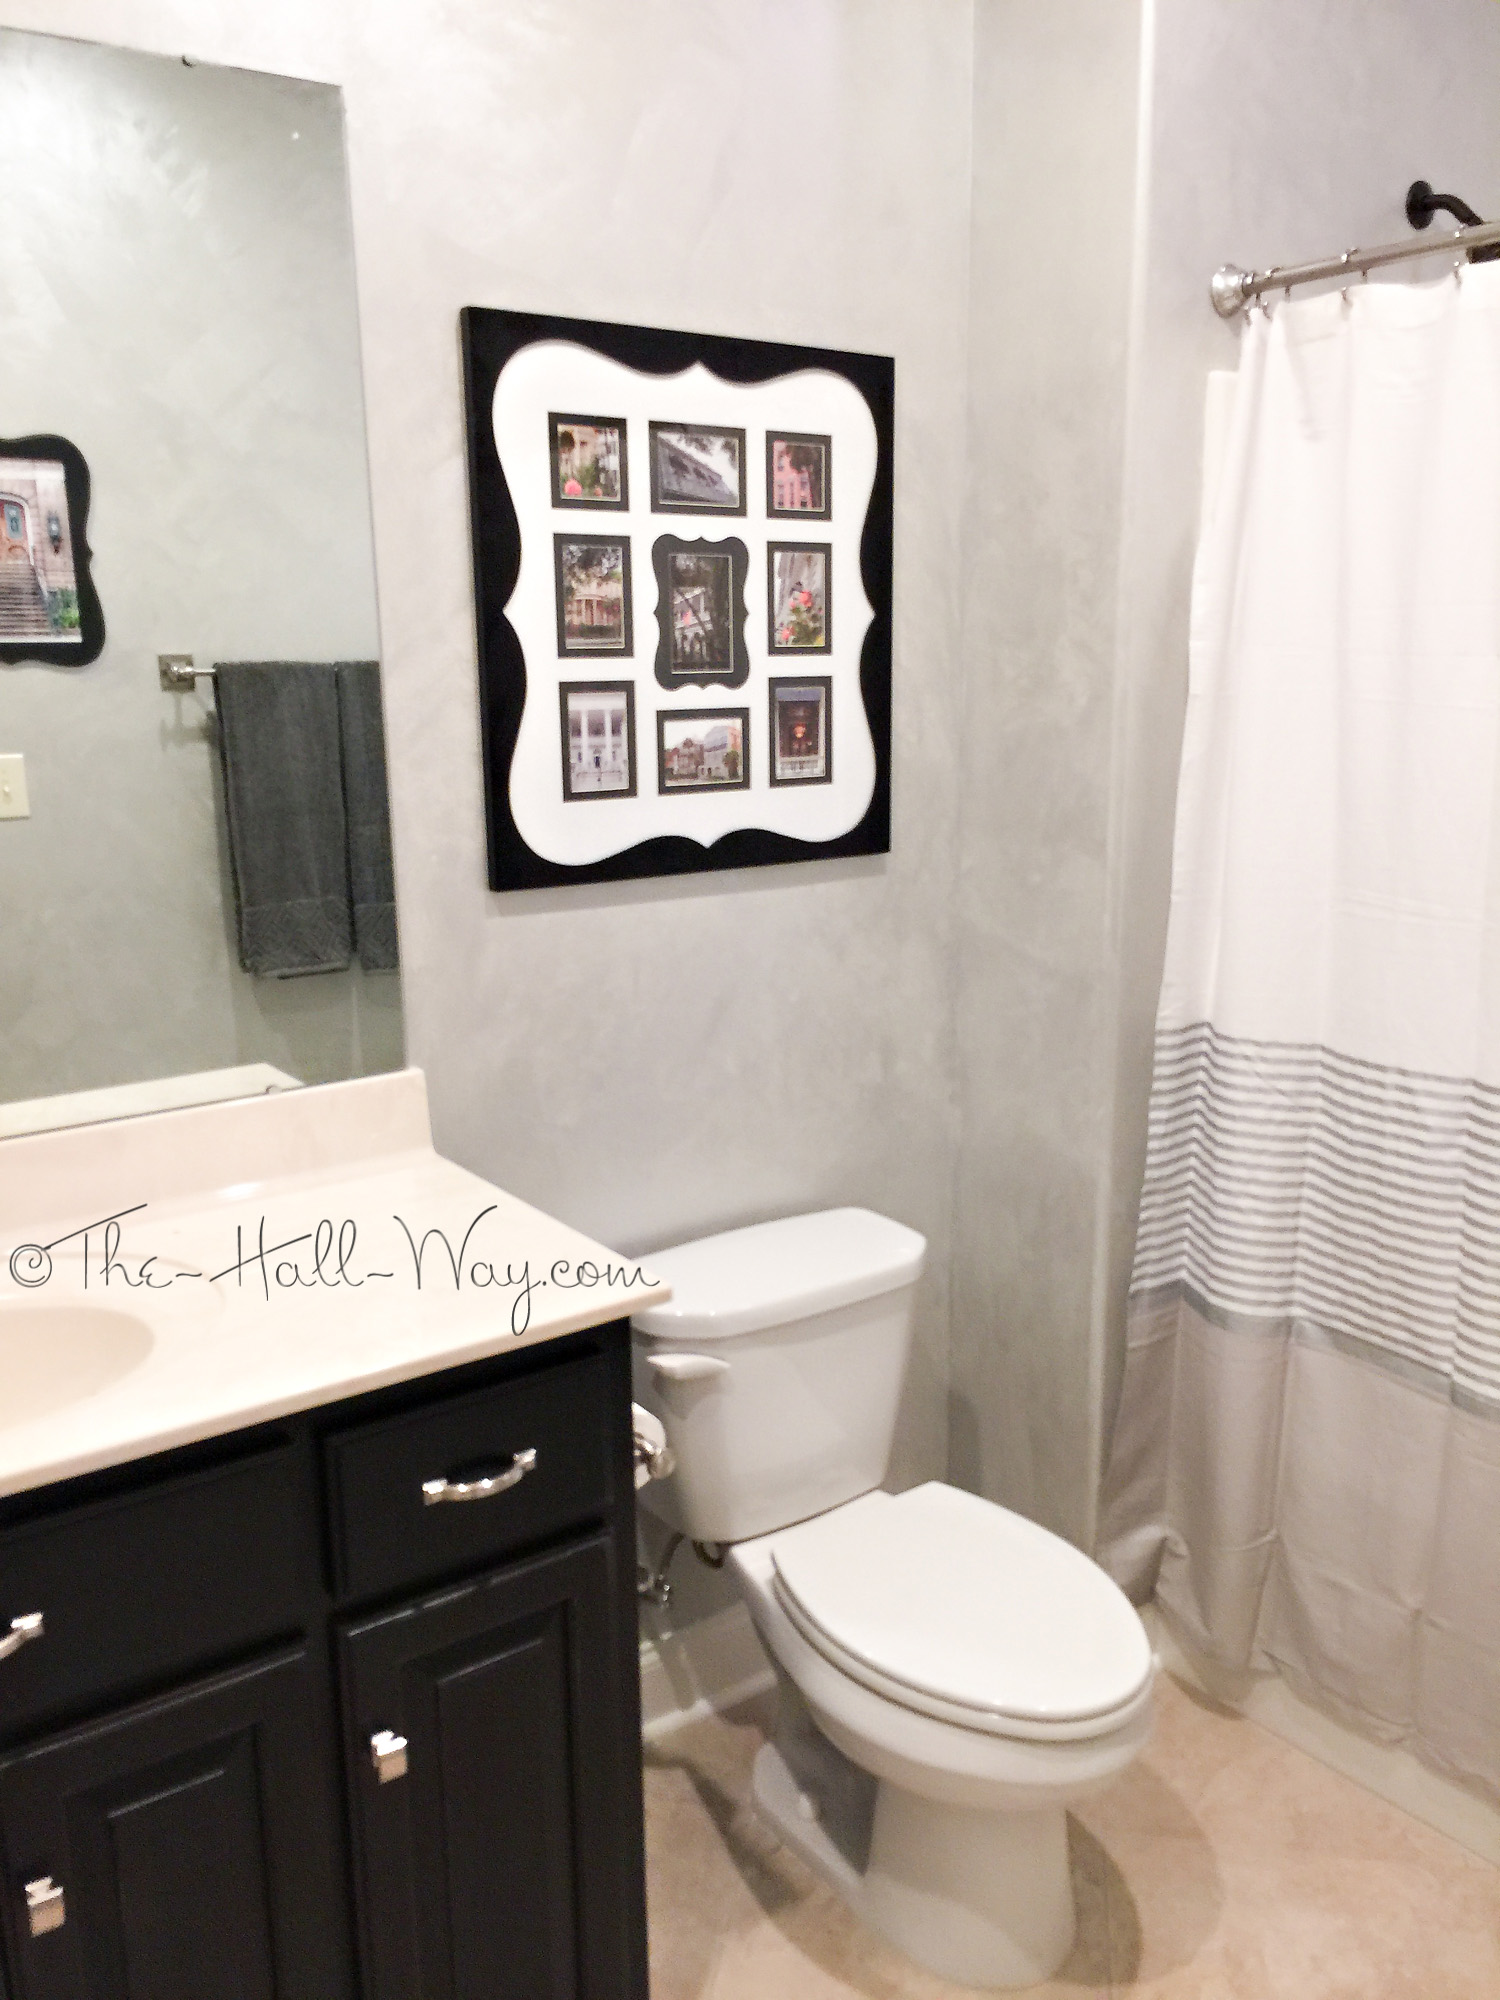
Continuing on the bonus room bathroom, I felt the distressing on the vanity cabinet was a bit too rustic against the new metallic glazed walls. I bought an Ebony stain marker and ran it over the distressed edges on the doors, wiping off the excess after a couple minutes. It was a bit tedious, but fairly easy. You can see the contrast in the picture below.


The distressing is still visible, but much more subtle. I also switched out the oil rubbed bronze hardware with brushed nickel.

I also picked up some inexpensive brushed nickel accessories at Home Goods, replacing the oil rubbed bronze ones. New towels came from Target. (That pesky countertop is still ivory!)

The shower curtain also came from Home Goods and features metallic silver stripes which play off the metallic glaze on the walls.

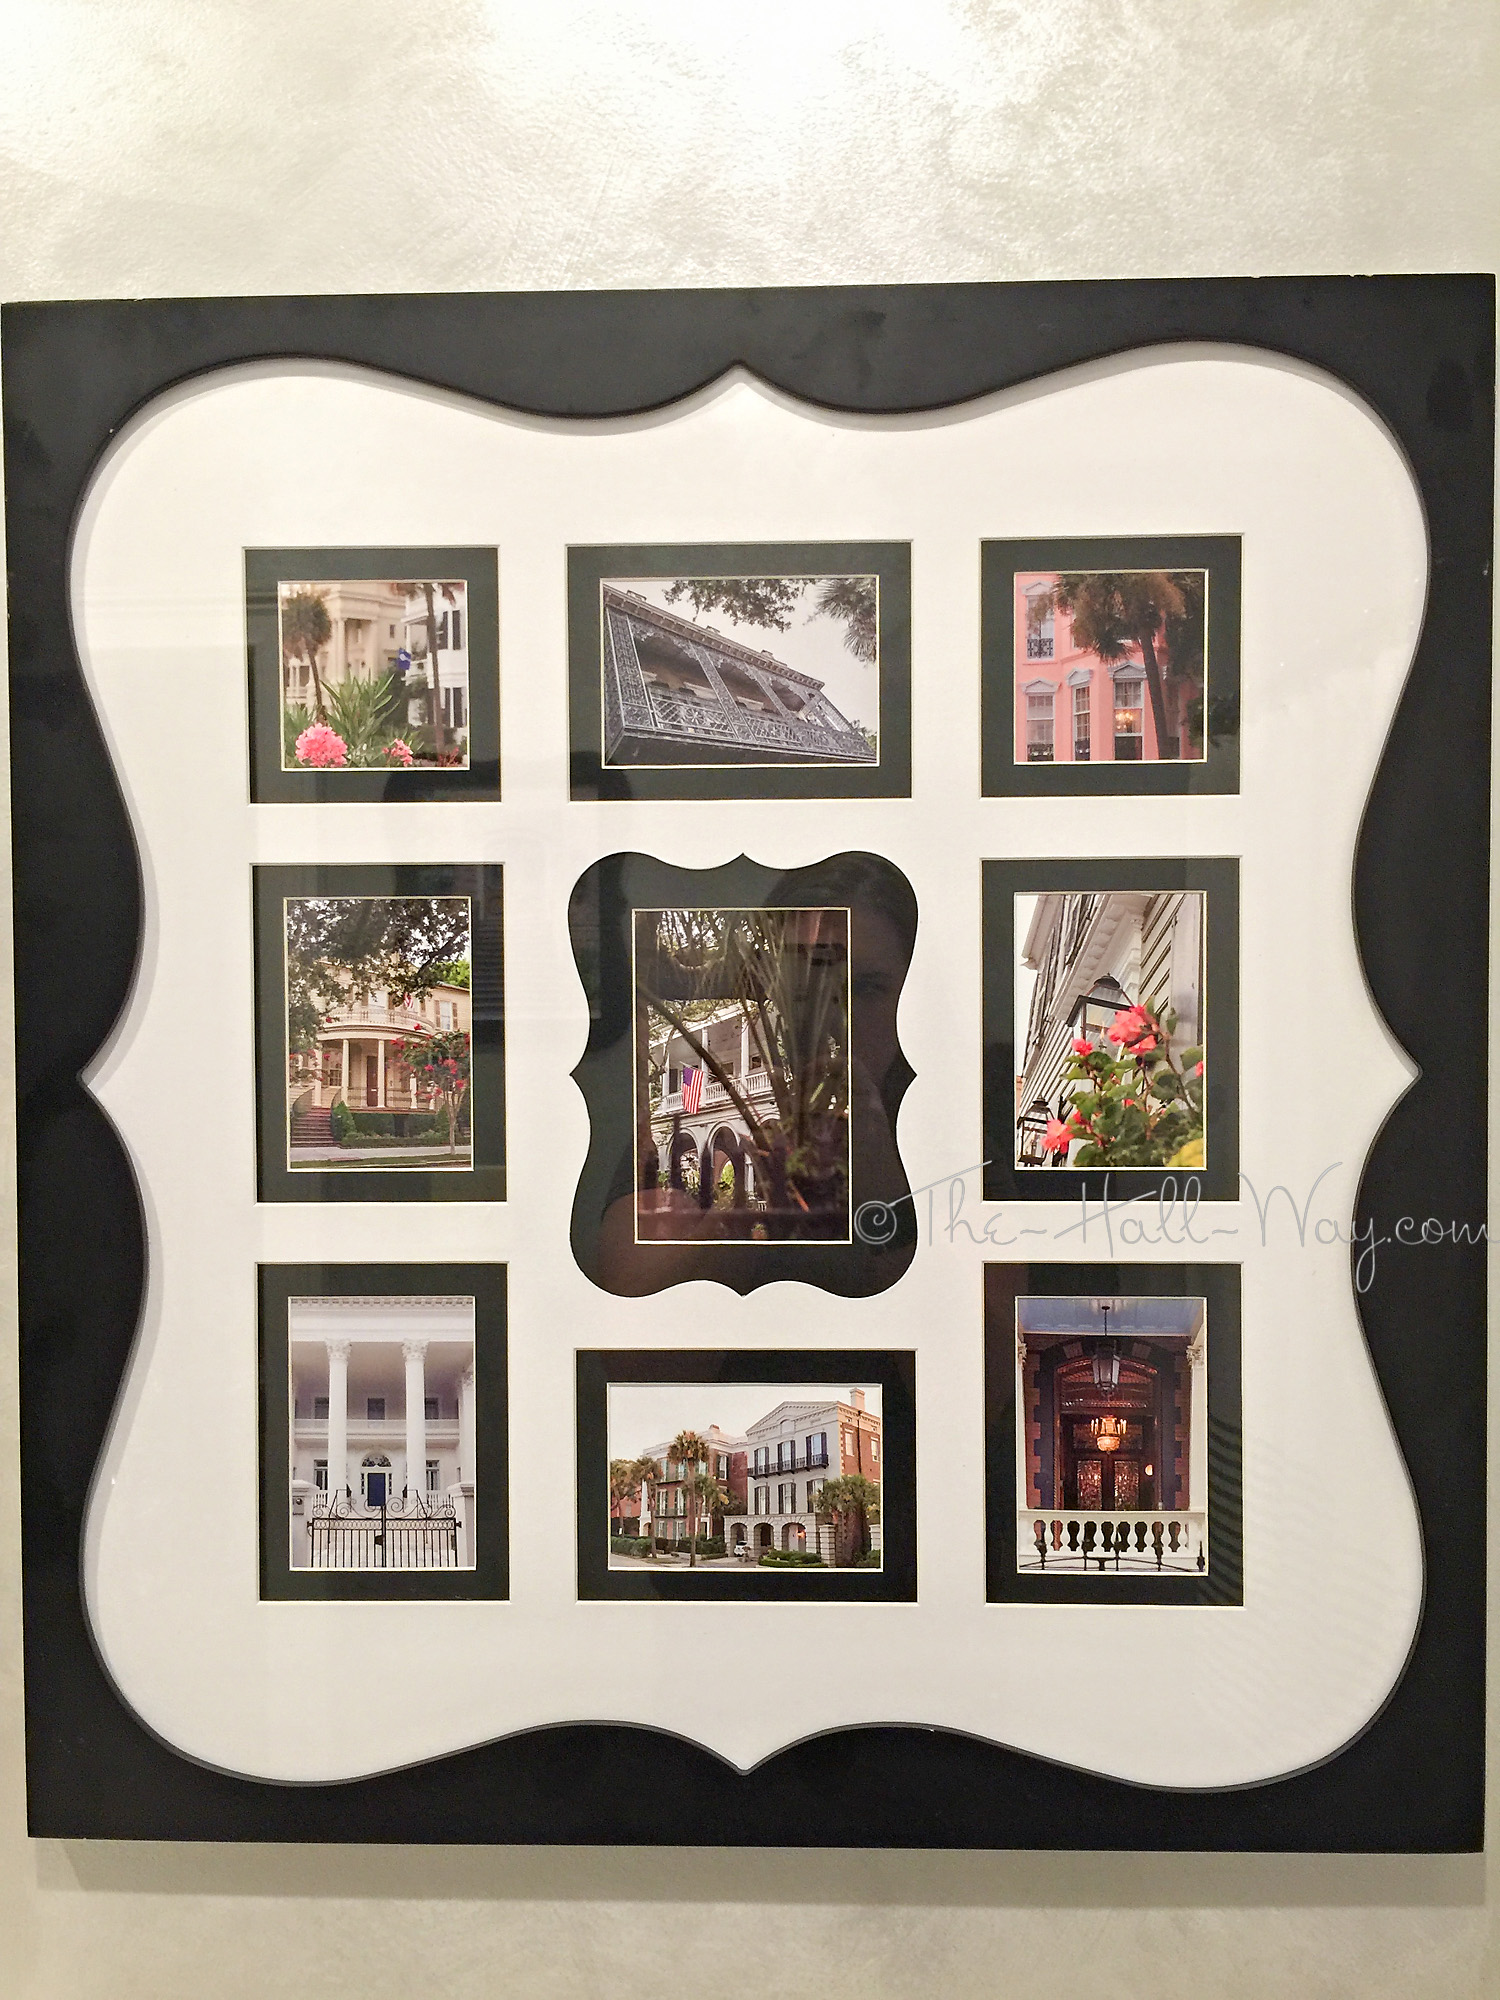
To break up the walls, I picked up a couple picture frames and printed off some of my pictures from our trip to Charleston, SC last summer.

Uh oh, where’d the countertop go???

A trip to the local granite store turned up a gorgeous remnant of leathered White Torroncino granite. Spent a lot more than I would have liked, but it’s beautiful!


New countertop meant we needed a sink and I wanted to get a nickel faucet. Quick searching led me back to one I’ve had my eye on for years – the Moen Boardwalk.

For the sink, I just went with a plain white square undermount. Here’s it all together before it was glued down.

For the backsplash, I went with a sample I’ve had for a while. It matches perfectly.

All that’s left is to replace the tub faucet and shower head which is still oil rubbed bronze. I’m keeping my eye out for something very inexpensive since it is highly unlikely anyone will ever take a shower up there. Final pics to come . . .
Home Theater Bath – Part 1
Since we started working on the Bonus Room Home Theater, the bathroom up there has been driving me nuts. It’s the same colors as the original bonus room, but it completely clashed with the new color scheme. I’ve been struggling to come up with some awesome design for in there, but couldn’t come up with anything. I finally decided to just get it painted and go from there.

The ceiling became Behr Silky White – the same as the majority of the house. I didn’t want to use Behr Silver City on the trim and ceiling like in the bonus room because, while being a large bathroom, it is still windowless and I wanted something brighter and clean. For the walls, I chose Behr Dolphin Fin in Satin. It is a pale grayish blue – similar to our Master Bedroom.
First Coat . . .

Second coat (still wet which is why you can see the edge lines) . . .


It turns out that faux finishes apparently aren’t as popular as they were a few years ago. I went out in search of some metallic paint or glaze and had a horrible time finding any. Benjamin Moore was the only place that had it in silver and it wasn’t cheap. I picked up a quart of Silver and Pearlescent White figuring I could use whatever was left on other projects.

I painted some swatches over the new wall color. I “scrubbed” the glaze on with one paint brush, then used a large 4″ brush to smooth out the lines and make it more subtle. The swatch on the right is an approximate 50/50 mix of the Pearlescent White and Silver.

It was hard to get a good picture of, but here’s a close up of the white. I decided the white was too subtle, but the silver alone was darker than I wanted. Good thing I bought both!

The finished walls almost look like wallpaper. Took some time, but it’s growing on me. You can see the trim is still the original color.

I knew this was coming, but a result of the new colors was that the countertop now stood out. The tub and toilet are white, but the counter was ivory cultured marble. The white trim and silver walls made it look dingy.

My first choice was to replace it with granite, but this is a 48″ vanity and even a remnant wasn’t going to be cheap. I could get the identical white cultured marble counter for less than $150, but wasn’t crazy about that idea either. What to do?
Home Theater – Final Reveal
Here they are, the final images of the home theater.
Click HERE to view the progress from start to finish
along with all the details.
All work was completed by us – nothing was hired out. Like every room, there are still little projects that could be done, but the majority are finished. Here’s a quick look back at where we started.


And here it is now . . .


New trim and wall paint, DIY Lighted Poster Frames and vinyl wall decals.


The stair landing gives you a glimpse of what’s to come.

Looking back at the staircase. The bathroom still needs to be painted a coordinating color. All the light switches and outlets were changed to black and dimmers added to the lights.

The ceiling fans were replaced with lower profile models in coordinating pewter and black. The recessed lighting trim was painted to blend in. Speaker and electrical wires were ran. A seating platform was designed and built with LED lighting along the edges.

The blinds were replaced with blackout curtains. The window where the screen is was covered with blackout fabric so that it looks like it just has a blind from the outside.

The platform includes outlets for the power recliners and a Buttkicker which shakes the platform with the movie sound effects.

The platform was finished with peel and stick vinyl that mimics wood. The wire hanging down in the picture below controls the platform lights which can change colors and/or do different effects.


Here’s the view from the back row . . .

. . . and the front row.


As mentioned above, the platform lights can change colors – Roll Tide!

A hole was cut in the wall so that the wiring could be ran. Then a cabinet was built to house the electronics. I built a cover out of pierced metal and trim boards.

The cover is easily removable as it just hangs on 2 screws.

The extra space at the back of the room has our exercise equipment. I have plans to refinish the bar table on the right. It can be pulled out from the dormer for eating while watching the big screen.

135″ screen with 3D high definition projector. We have had the speakers for several years.

Finally, a parting message at the bottom of the stairs.

This room turned out awesome and I think it’s my favorite room that I’ve designed (The Kid’s room being a close second). Again, you can see all the progress by clicking HERE.
The End
A New Year
I hope everyone had a very Merry Christmas and a great New Year! As usual, the end of the year was busy for us. I procrastinated on putting up our Christmas decorations, but scheduling a long overdue surgery got me moving. I wanted to get it done for The Kid since I wasn’t sure how soon I’d be up to it after the surgery. (Turns out, it went really well and I probably could have done most of it a week later).
Anyway, I had came across this Christmas tree and really wanted to replicate it.

I went back and forth on whether I could pull it off and finally decided to go for it. I also wanted to replace our fiber optic tree with a white or flocked one. I found one I loved at Home Depot, but the 9′ one was more than I wanted to spend. I got the idea from my parents to build a stand for a 7.5′ tree. This had the added bonus of keeping it high enough that the dogs can’t walk under it and rub the flocking and glitter off. I bought a 24″ butcher block round when I went to buy the tree. I used some waste 2x4s to build a cube, then screwed the table top onto it. The tree stand fit perfectly. It was discussed whether to anchor the tree stand to the base I made, but I decided just to try just sitting it on top. So far, we haven’t had a problem with it moving.

I found the polar bears from the original inspiration tree on Amazon, but, unfortunately, they weren’t cheap. So, I only ordered a set of the 12″ ones. If I ever find the larger ones marked down, I’d love to get them.

I ran several places, but ended up buying all the decorations at Hobby Lobby and our local Design World. It turned out better than I imagined!

I later picked up some sparkly “snow” to fill in under the tree skirt.

The red and white ribbon came from Sam’s Club last year. The black chalkboard ribbon I picked up there this year.


The white snowball deco mesh, large white “bottle brush” ornaments and the red glitter/white fuzzy striped ornaments came from Design World. Everything else, including the picks, came from Hobby Lobby.


One of the reminders of The Reason for the season.


I also decorated the staircase to match. The small ornaments were extra from my backyard decorations. I dug out my collection of stuffed polar bears and placed them around.

For the past 9 years, I’ve taken pictures of The Kid and custom designed our Christmas Card. It didn’t get done this year, but I made a handful of paper cards using my Silhouette Cameo machine. They took almost 4 days to make, but they turned out pretty cute! They can stand up and rock side to side.

And one more picture of a warm rainy night around Christmas. . .

I’m not sure what 2016 has in store, but I guess we’ll see! In the meantime, I want to get some painting done around the house – the bonus (theater) bathroom, the second floor doors and some other random areas. I’m also looking into building a headboard like The Kid’s to sell. If it goes quickly, I may make others to sell as well. I also plan to finally post the final pictures of the theater.
Home Theater – Part 9
I’ve been on the lookout for letters to use above the bonus room door. I was going to do something fancy, but ended up keeping it simple. I picked the letters up from Hobby Lobby. They were originally black with gold distressing. I sprayed them with Rustoleum Soft Black Iron to match the rest of the theater accents. I brushed on some glitter craft paint to highlight them a bit. I ended up using double sided mounting tape to hang them instead of nails. That made it a lot easier to keep them straight and evenly spaced (which they are even though they don’t look it in the picture!).

The recliners arrived a couple weeks ago. We ended up driving 50 miles to pick them up instead of waiting another week for them to be delivered. They are a little smaller than I pictured, but comfortable with soft leather. Better pictures to come . . .

I can’t take too much credit for the most recent project as David did almost all the work. We had been looking into making lighted poster boxes for quite a while. There are lots of variations all over the internet and we kind of came up with our own. Real ones are pretty expensive.
First, he built a frame using 1x3s which he cut a notch out of for the back board. The corners are mitered and assembled with nails and glue.

The notch he cut from the 1x3s allows the plywood back to lay flush.

I sprayed them with Rustoleum Soft Black Iron (lost count how many cans I’ve went thru in this room!).

He lined the inside the boxes with window flashing to reflect as much light as possible inside.

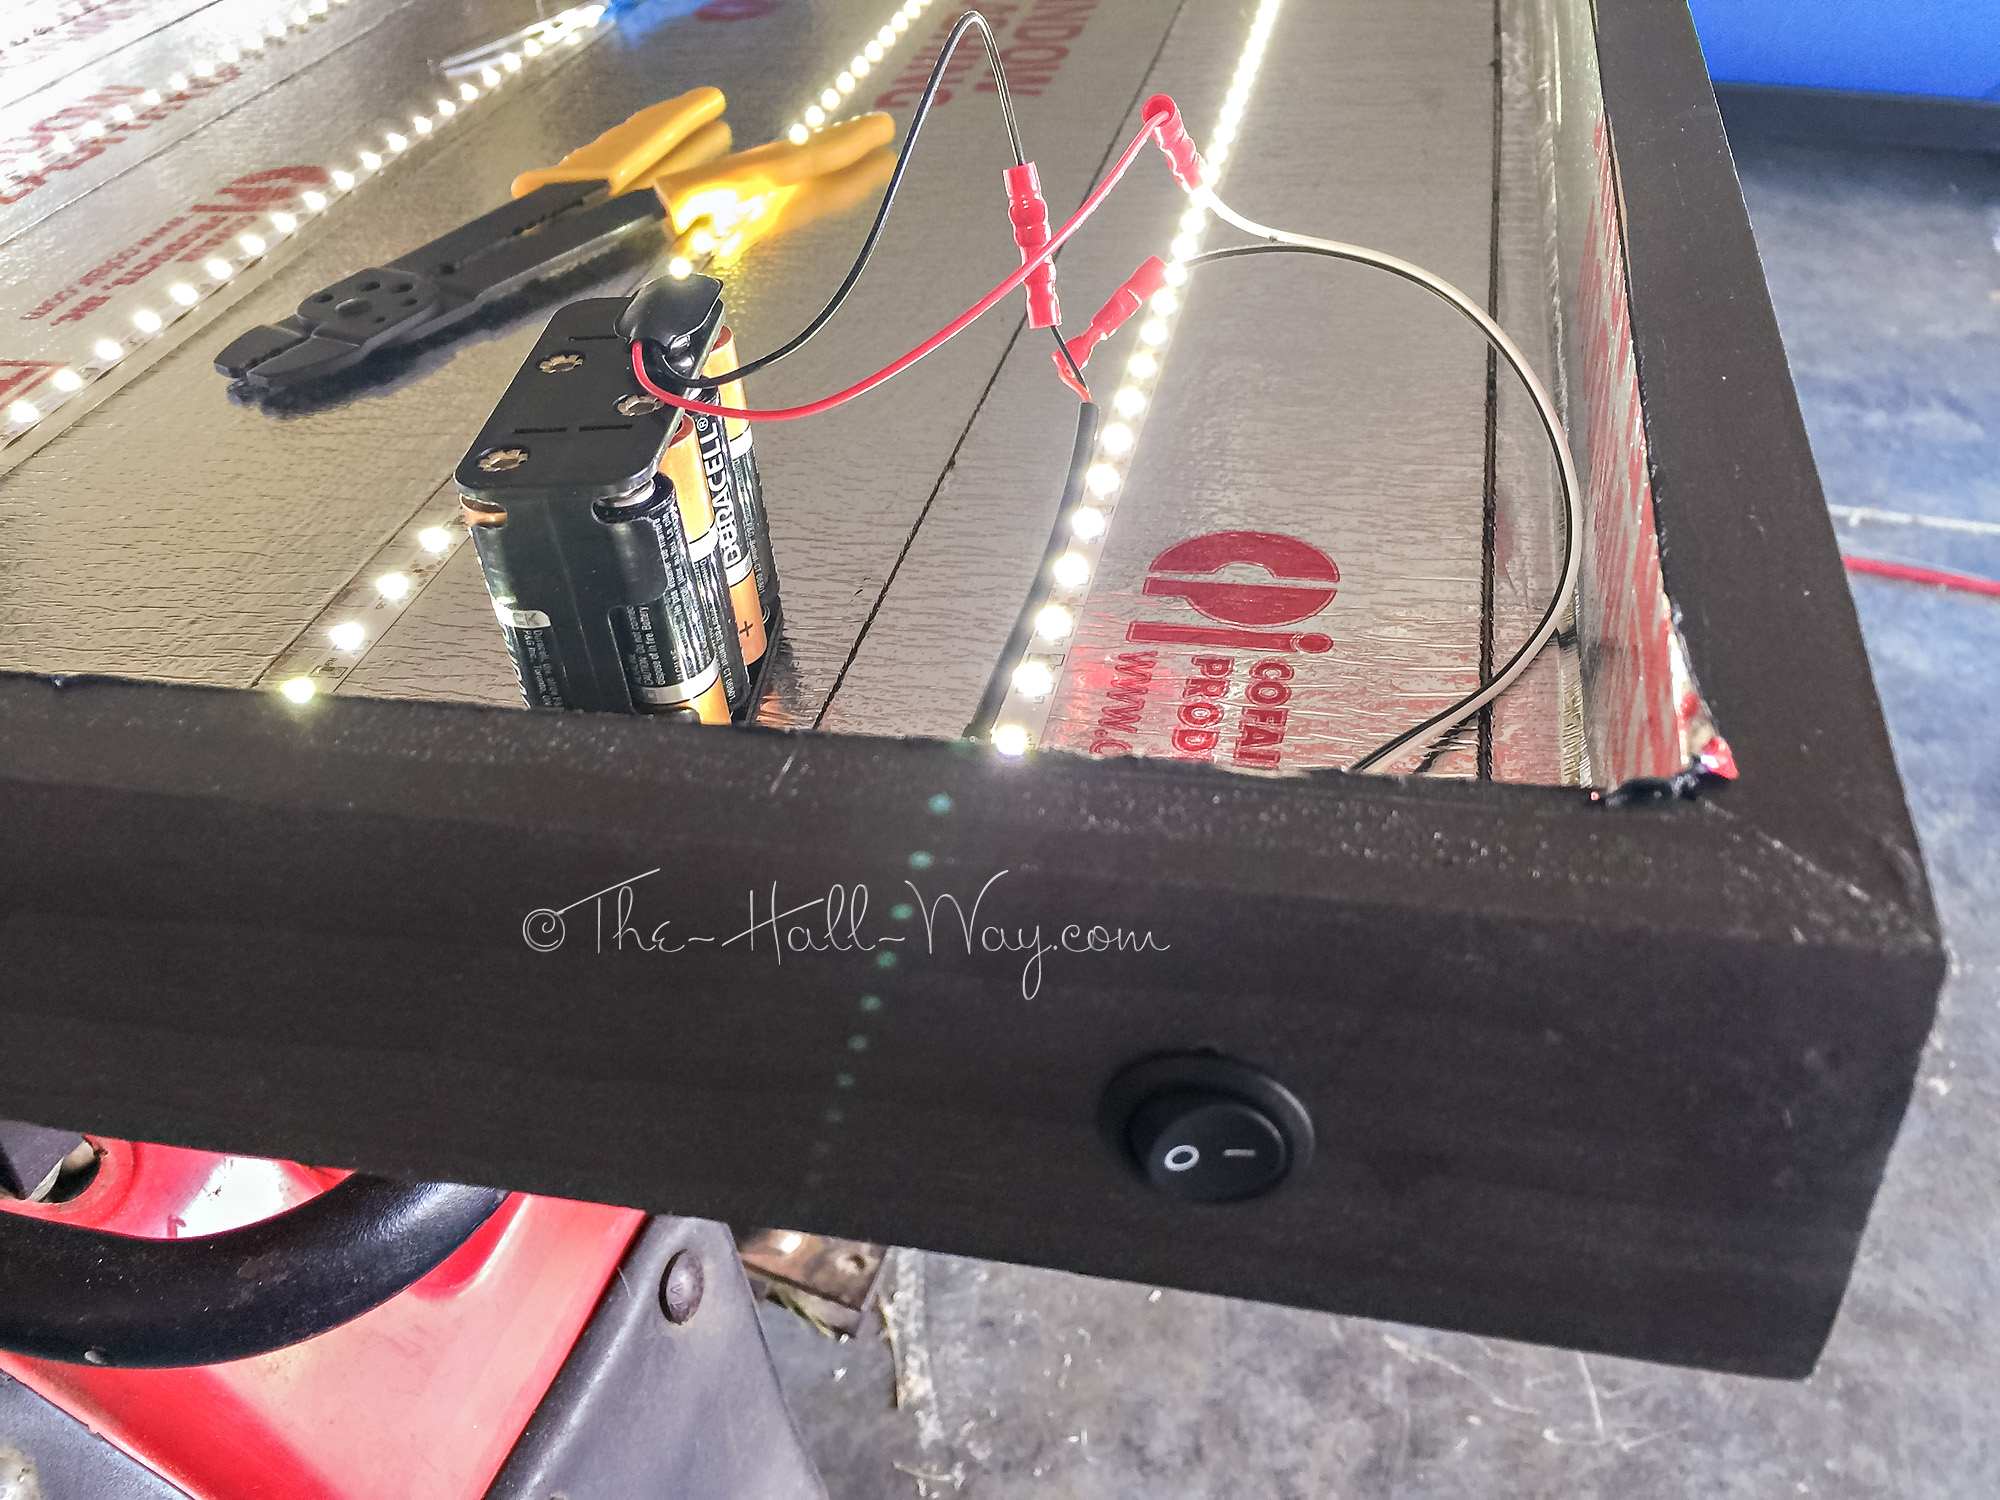
Then, he began installing the LED light strips. They are very similar to the lights we used on the platform. These are smaller and do not change colors.

He used connectors on 2 of the boxes to connect the rows of lights. The third box was soldered. . .

We wanted them to be battery powered since they were going on the staircase where there aren’t any outlets. Each one is using 8 – AA batteries. We’re not sure how long they’ll last, but they aren’t something we’ll leave on for long periods of time.

The lights, connectors, battery packs, and switches were all ordered from Amazon (link list below).

He drilled a hole in the bottom right corner and installed the switch where it’s not visible.

The battery pack just sits inside on the bottom of the frame.
The actual frame is a 27×40 collage frame I bought at Old Time Pottery for $30, then spray painted to match. I figured that was easier than trying to make something. David attached the picture frame to the box he built using a piano hinge.

We ended up breaking the glass in all three frames (oops), so we bought sheets of plexiglass that were cut down to size at Lowe’s. Each frame has 2 sheets of plexiglass with the poster in between.

He used the same keyhole fasteners that we used on the electronic’s cabinet to mount them to the walls.

We have one hanging between the bathroom door and the top of the stairs. The other 2 are hanging along the lower flight of stairs. (Vinyl decal cut by me using my Silhouette Cameo.)

We borrowed my parent’s Narnia poster to test since we hadn’t ordered any yet.

It’s been hard to decide which posters to get. They have to be double sided which they don’t make reproductions of. Depending on the movie, they can be really expensive or impossible to find. We chose Payback as a “classic” movie for us and the movie I named my beloved Mastiff, Porter, after.

I’ve always been a musical lover and the film version of Les Miserables is incredible. I also thought it would make a good lighted poster.

We have one more poster to order which is still TBD. We finished the boxes off with some weather stripping to keep the light inside and a roller catch on the top and bottom to keep the “door”/frame shut. It just needs to be opened to change the batteries when needed and the poster, if wanted.

The poster frames really add to the “theater” feel of the space. Especially since you encounter them as you go up the stairs, before you are able to see the screen or the room.
I think that is all the projects we had planned for the new theater. I just need to do some minor finish work, then I will get some real pictures of the finished space.
To Be Continued . . .
Light Box Parts List & Links
LED Strip Lights – http://smile.amazon.com/dp/B00HSF65MC (I prefer the color of these better)
http://smile.amazon.com/dp/B005EHHLD8
LED Connectors – http://smile.amazon.com/dp/B00GTGLCXI (can also be soldered in leu of using connectors)
Switches – http://smile.amazon.com/dp/B00ARBP7Q4
Battery Holder – http://smile.amazon.com/dp/B000LFRTIK
Battery Clip – http://smile.amazon.com/dp/B0002ZPFU8