Blog
Colorado
I have projects I should post about, but today I have a more important post to share. If anyone is in Colorado, near Durango, please be on the lookout for this lost dog.
She is a female, brown brindle, long haired dog with large upright ears. Due to recent medical issues, she is very thin. Her name is Bisous (Beezu). There is a $300 reward.
If you have any information, please comment on this post below or use the Contact form and I will get back to you right away.


DIY Concrete Acid Stain
No, I didn’t drop off the face of the earth! I am still here – just have been very busy the past few months. I’ve been keeping an eye on this blog, but haven’t had time to keep up with posting. I’ve been working on a lot of projects and hope to post about some of them soon.
This week I worked on a project I had been contemplating since we moved into the house. The back porch is tiled, but the patio was just plain concrete. Since it is surrounded by brick, it always stays dirty. Leaves, mulch, dirt and everything else collects in there and it’s always dirty.

We had acid stained the concrete slab in our first house kitchen and I had been wanting to do that to the patio here. I had found a local supplier for the acid stain so we wouldn’t have to pay the high shipping costs like we did with our first house. I picked up 4 gallons of Kodiak (a dark gray-brown) stain, 2 gallons of Copper (a golden brown) stain and two 5 gallon buckets of sealer.
Tuesday afternoon, I began pressure washing the patio to get it clean down to the bare concrete. The acid reacts with the minerals in the concrete which causes it to change color. It’s not just a topical stain that can wear off – it actually physically changes the color of the concrete. So, anything left on the concrete can interfere with the ability of the acid to react.

It took me about 3.5 hours to finish.

Since the concrete was now nice and clean, I decided I better apply the stain the next day instead of waiting for the weekend when David was off. I used two, all plastic, garden sprayers – one for each stain color. I contemplated diluting the stain to keep it lighter, but decided just to leave it on the minimum amount of time instead. (Turns out, I probably should have diluted it too.) I sprayed the copper stain sparingly in random areas, then filled the rest in with the Kodiak color. My dad helped by holding cardboard against the brick, but the cardboard got saturated and some still got on the brick. In hindsight, I probably should have bought a piece of plexiglass to use instead. Both colors went on yellow and this is how it looked when I was done . . .

It was RED!!!! Not at all complimentary to our brick. I would have freaked out except there wasn’t anything I could do about it at that point.

For some reason, the area in front of the garage door took the stain differently from the rest of the concrete. I let the acid react for 4 hours, then I began neutralizing it with baking soda and water. That made it start fizzing, “smoking” and turn this beautiful yellow color.

I rinsed the patio 4 more times to make sure the concrete was clean. At least it doesn’t look as red now . . .

This area still looks different, but once the furniture is back out it shouldn’t be as noticeable.

The next evening, I began applying the sealer. The hard part was keeping debris off the sections I was working on. I used the leaf blower and compressor to blow each section off, but dirt still blew back on it. It turned out to not be as tacky as I expected, so it wasn’t a big deal. Most leaves and stuff could be brushed off once the sealer was dry.

We applied the second coat of sealer the following night. Since it is high gloss, there was concern about it being slippery, but our concrete is rough enough that it’s not really an issue. I wouldn’t recommend running across it when it’s wet, but it’s fine otherwise.

It rained sooner than we expected, but the sealer seems to be working well.

It is much darker than I would have liked, but the color turned out ok. I was worried about it being hot, but it’s not really any worse than it was gray. It looks a lot better than the plain gray and it will hide the dirt much better.

We waited about 48 hours before we put the furniture back. The sealer should last about 3 years before it needs reapplied.
Home Theater Bath – Final Reveal
Once the bonus room to home theater transformation was complete, the bathroom up there was in need of a makeover. (Click Here to see the previous posts).

I didn’t really have a vision for this room when I started – it all started with the new wall paint. I used a pale gray-blue with a metallic glaze. I wanted to keep it light as there are no windows in this room and as a contrast to the darker theater outside.

The only original parts of the bathroom remaining are the vanity, tub, toilet and floor. The distressing on the vanity was toned down with an ebony stain marker. The slab mirror had some black trim added. (Just want to note that it’s hard to get the colors to photograph correctly in this room between the lights, lack of windows and light coming from the other room.)

The dark hardware was replaced with brushed nickel.

A sparkling granite took the place of the ivory cultured marble countertop and a new faucet and tile backsplash dressed things up.

All the bathroom accessories were changed to brushed nickel.


The tile backsplash is made up of clear and opaque glass and shell.


I printed off some of my photographs from our trip to Charleston, SC for the walls.


Below is a close up of the metallic glaze on the walls.


I think it turned out pretty nice. It’s a bit fancy for a room that doesn’t get a lot of use, but I figured I could get away with it since it’s the “theater” bathroom.
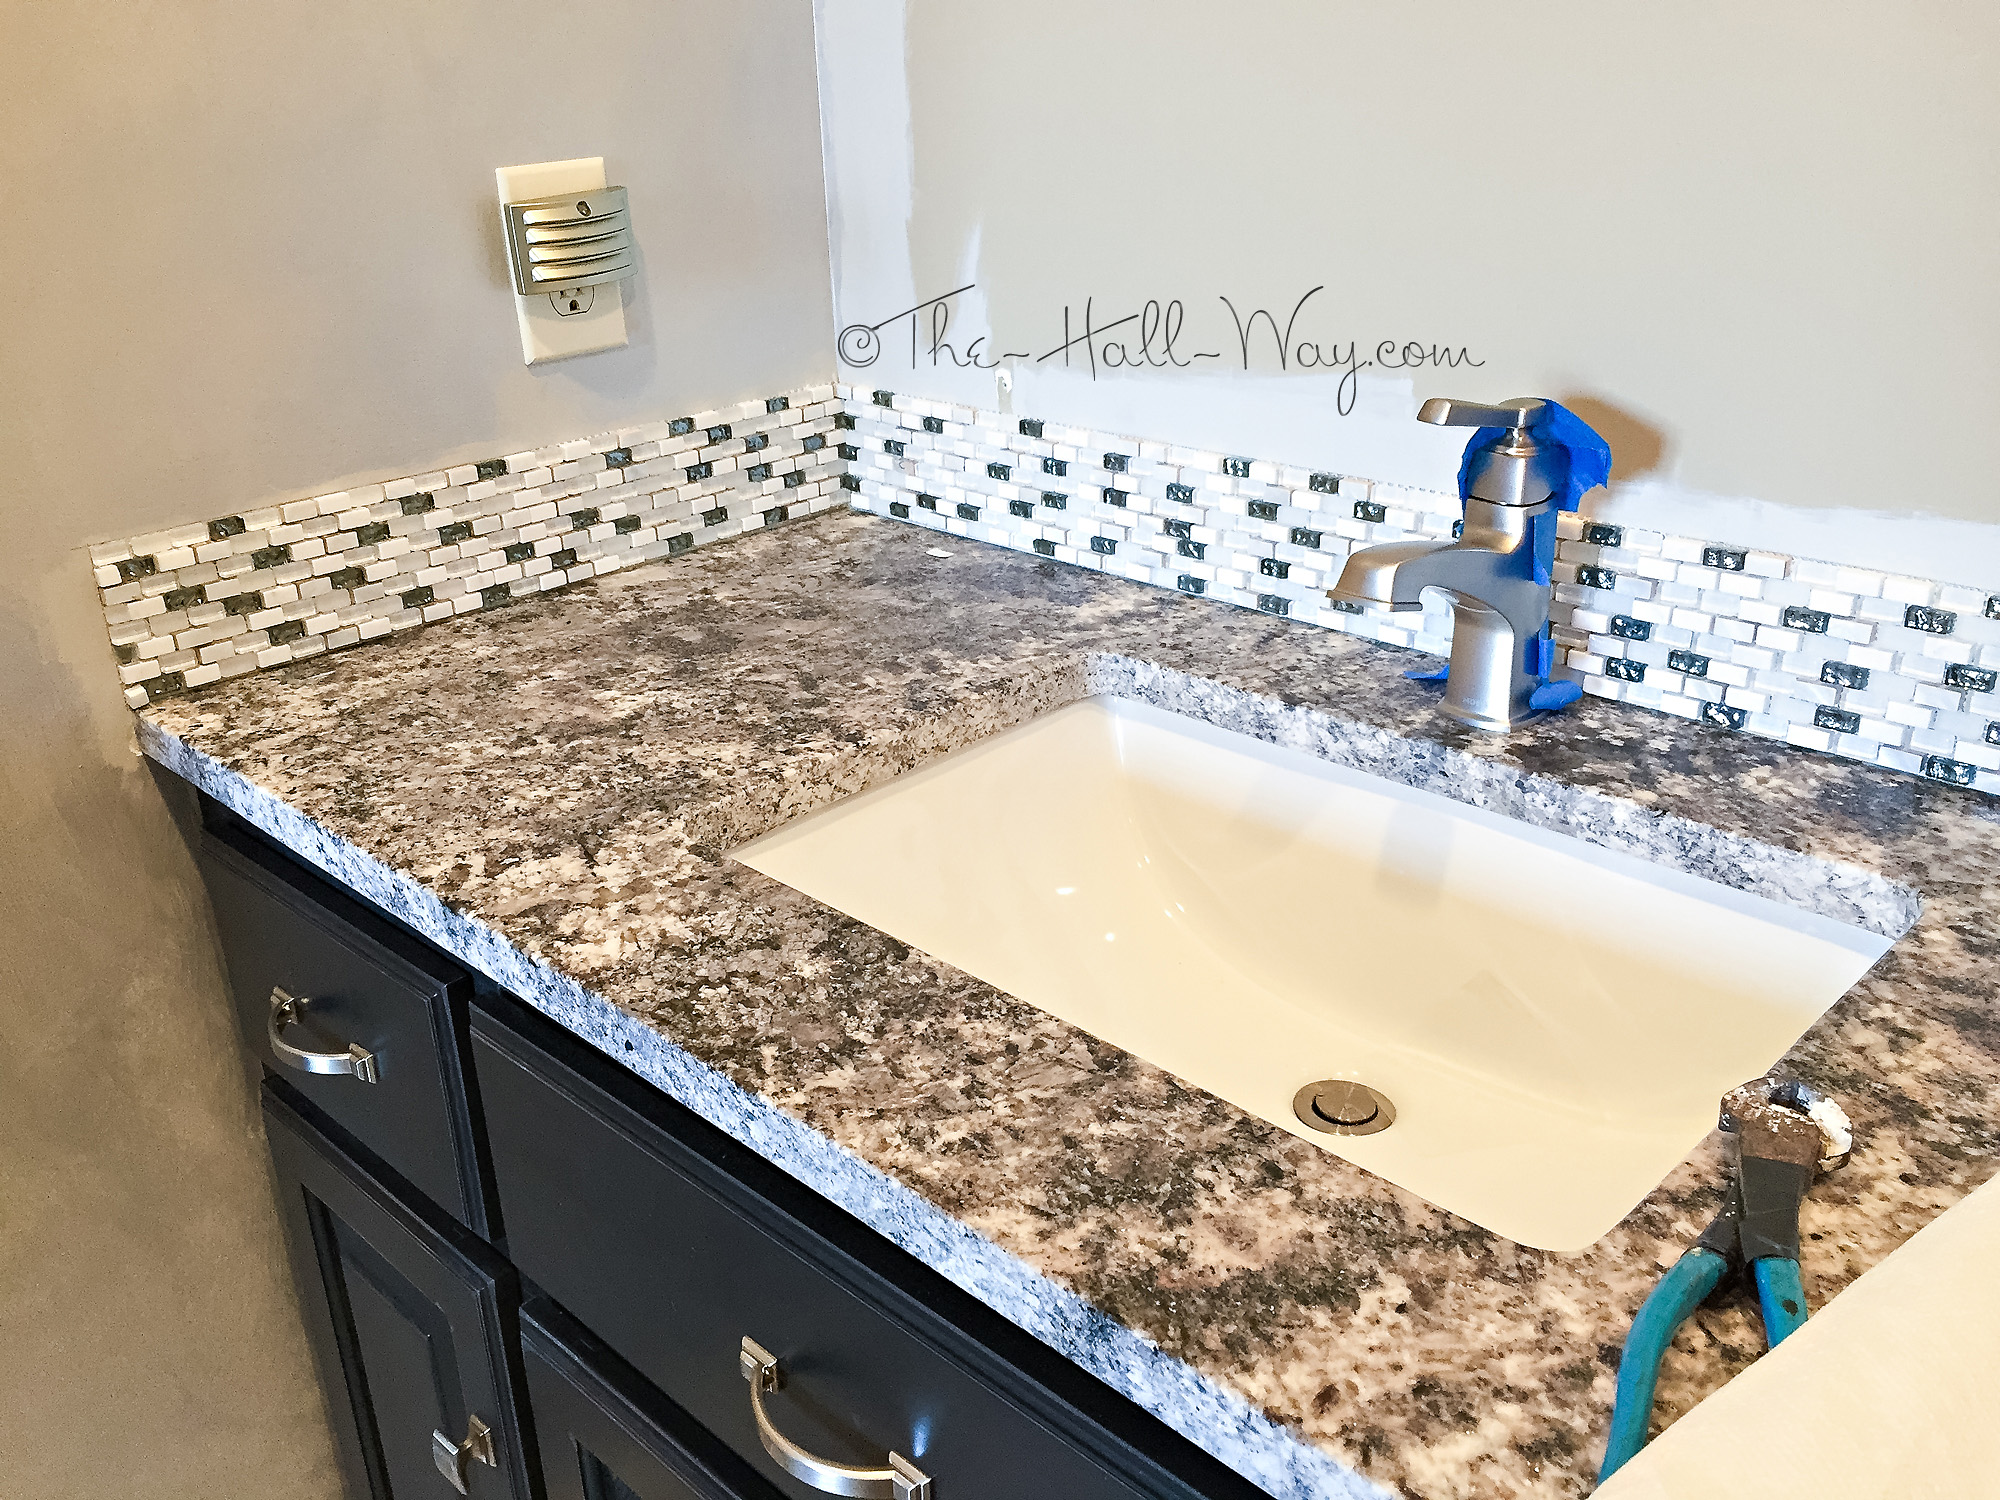
Home Theater Bath – Part 3
My last post concluded with the new countertop in place, but not glued down. We hooked up the plumbing and glued the granite to the vanity. Next, I painted the base wall color along the backsplash and along the edge of the mirror space. I didn’t want the old tan color to show thru the tile.

Since I was doing such a small area, I wasn’t crazy about messing with mortar for the tile. Instead, I used adhesive tile mats. It was much easier, faster and less messy. I just cut it to size, peeled off the backing and applied it to the wall.

Below is a close up showing with and without the tile mat in place.

All done! I smoothed it down multiple times to make sure it was going to adhere.

I then cut down my tile sheets to the correct height. I just had to remove the protective sheet from the tile mat, then attach the tile. Super easy! I just had to make sure I kept the tile spacing and top line even. (You can see where I drew a line on the wall for the top and side edges of the tile.)

Cutting the small tiles for the two ends was a challenge, but there was only 10 pieces.
Next came grout. I picked up some crystal grout so that it would be semi-transparent like some of the tiles. I was concerned because reviews said it was very hard to work with, but it wasn’t as bad as I feared. It was runnier than normal grout, but I got it done. As you can see, I taped and covered everything to make clean up easier. VERY glad I did that.

The grout is full of tiny glass beads and they went everywhere when dry. You can see where I got some on my arm below.

Once done, I cleaned the excess off and used a plastic bag to pipe a finished edge along the top and sides since there isn’t a caulk to match this grout.

Meanwhile, I bought an inexpensive shower/tub faucet on eBay. Turned out to not be the easy swap I thought it would be, so I probably would have been better off spending some more money. The valve cartridges didn’t match the old faucet, so David had to redo the plumbing and switch everything out. Fortunately, it is all easily accessible from the attic space on the other side of the wall. That is the main reason these final posts are so late.
I also bought some trim to finish off the existing plain slab mirror. I painted it black, then glued it to the mirror. Stay tuned to see it all finished!
Acacia Bar Desk
So, The Kid has been asking for a desk in his room for months. I had some ideas, but hadn’t been in a hurry to get it done. We recently checked out a local salvage store that had unfinished acacia butcher block. I knew it would be gorgeous once stained.

The question was – what stain? I tried a few options, then a few combinations of those stains. Below, I have a custom Sherwin Williams Charcoal on the left, Minwax Dark Walnut, Special Walnut, Early American and clear Poly.

The countertop was a foot too long and 2″ too deep, so we had to cut it down. We attached the 2″ off the back onto the bottom of the front edge. This gave it a thicker appearance from the front.

I went with the Early American with a quick stain of the Dark Walnut to add some depth.

Love it!


My idea was to create a bar under the window in his room.

While I was staining, David mounted some split 2x4s to the wall under the window.

He also added a support across the front.

It won’t really be visible except upon glancing from the staircase outside his room, but I went ahead and put a quick coat of the wall paint on it so it will blend in if seen.

Only a kid of mine wouldn’t think it was nuts if I showed up with these for his bedroom. Also purchased at the salvage store, 2 barstools made from steel and oil drums.

Still need to get some accessories, but here’s the finished project. The butcher block is attached to the supports with a few screws.


I have a few other small projects I’ve been working on that I will be posting about, along with final picture of the bonus room bathroom. Stay tuned!